Easter Egg Solver

This is a tool to help you solve the Ravenov Implications Easter Egg Steps.

Step 1: World 1 Set Up

  • Do all map objectives.
  • OPTIONAL! Complete a Trial.

Step 2: World 2 Set Up

  • Do all map objectives.
  • OPTIONAL! Complete a Trial.

Step 3: World 3 Set Up

  • Do all map objectives.
  • OPTIONAL! Complete a Trial.

Step 4: Obtain the Beacon Part 1

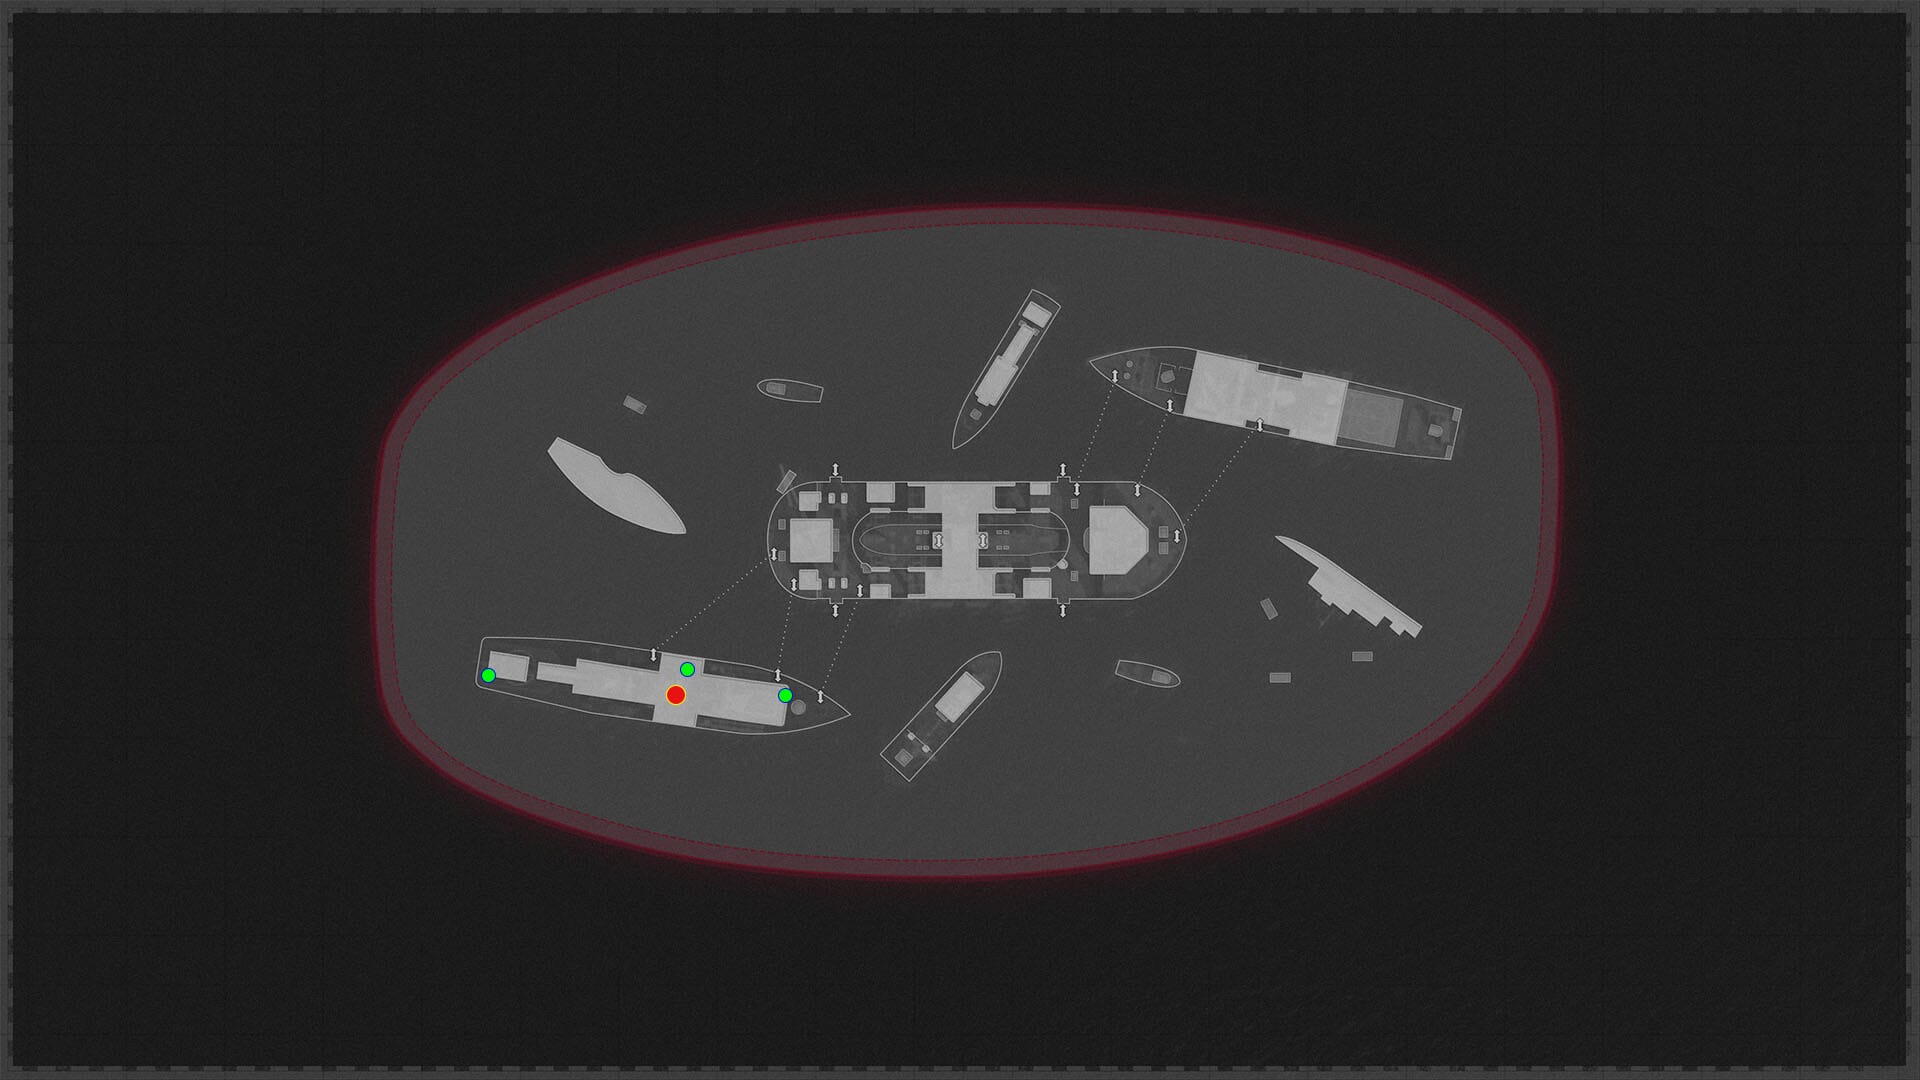
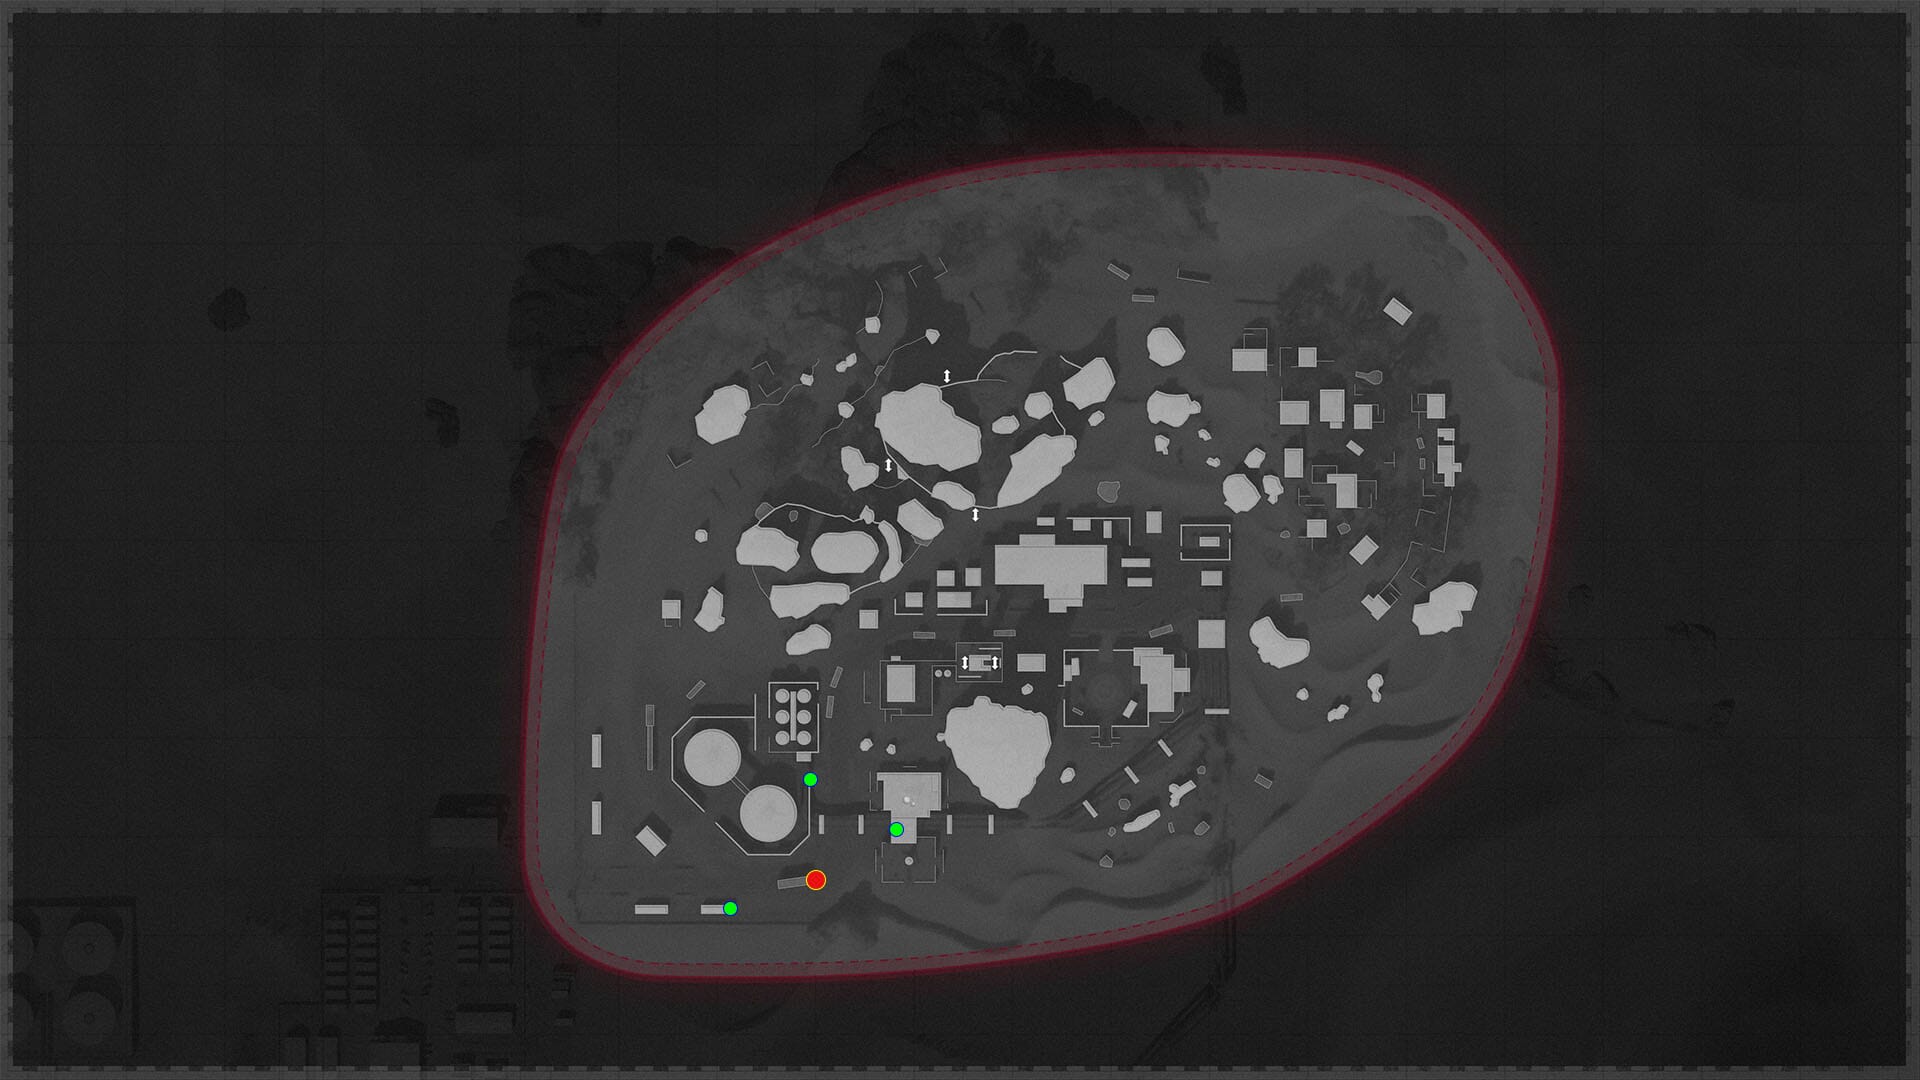
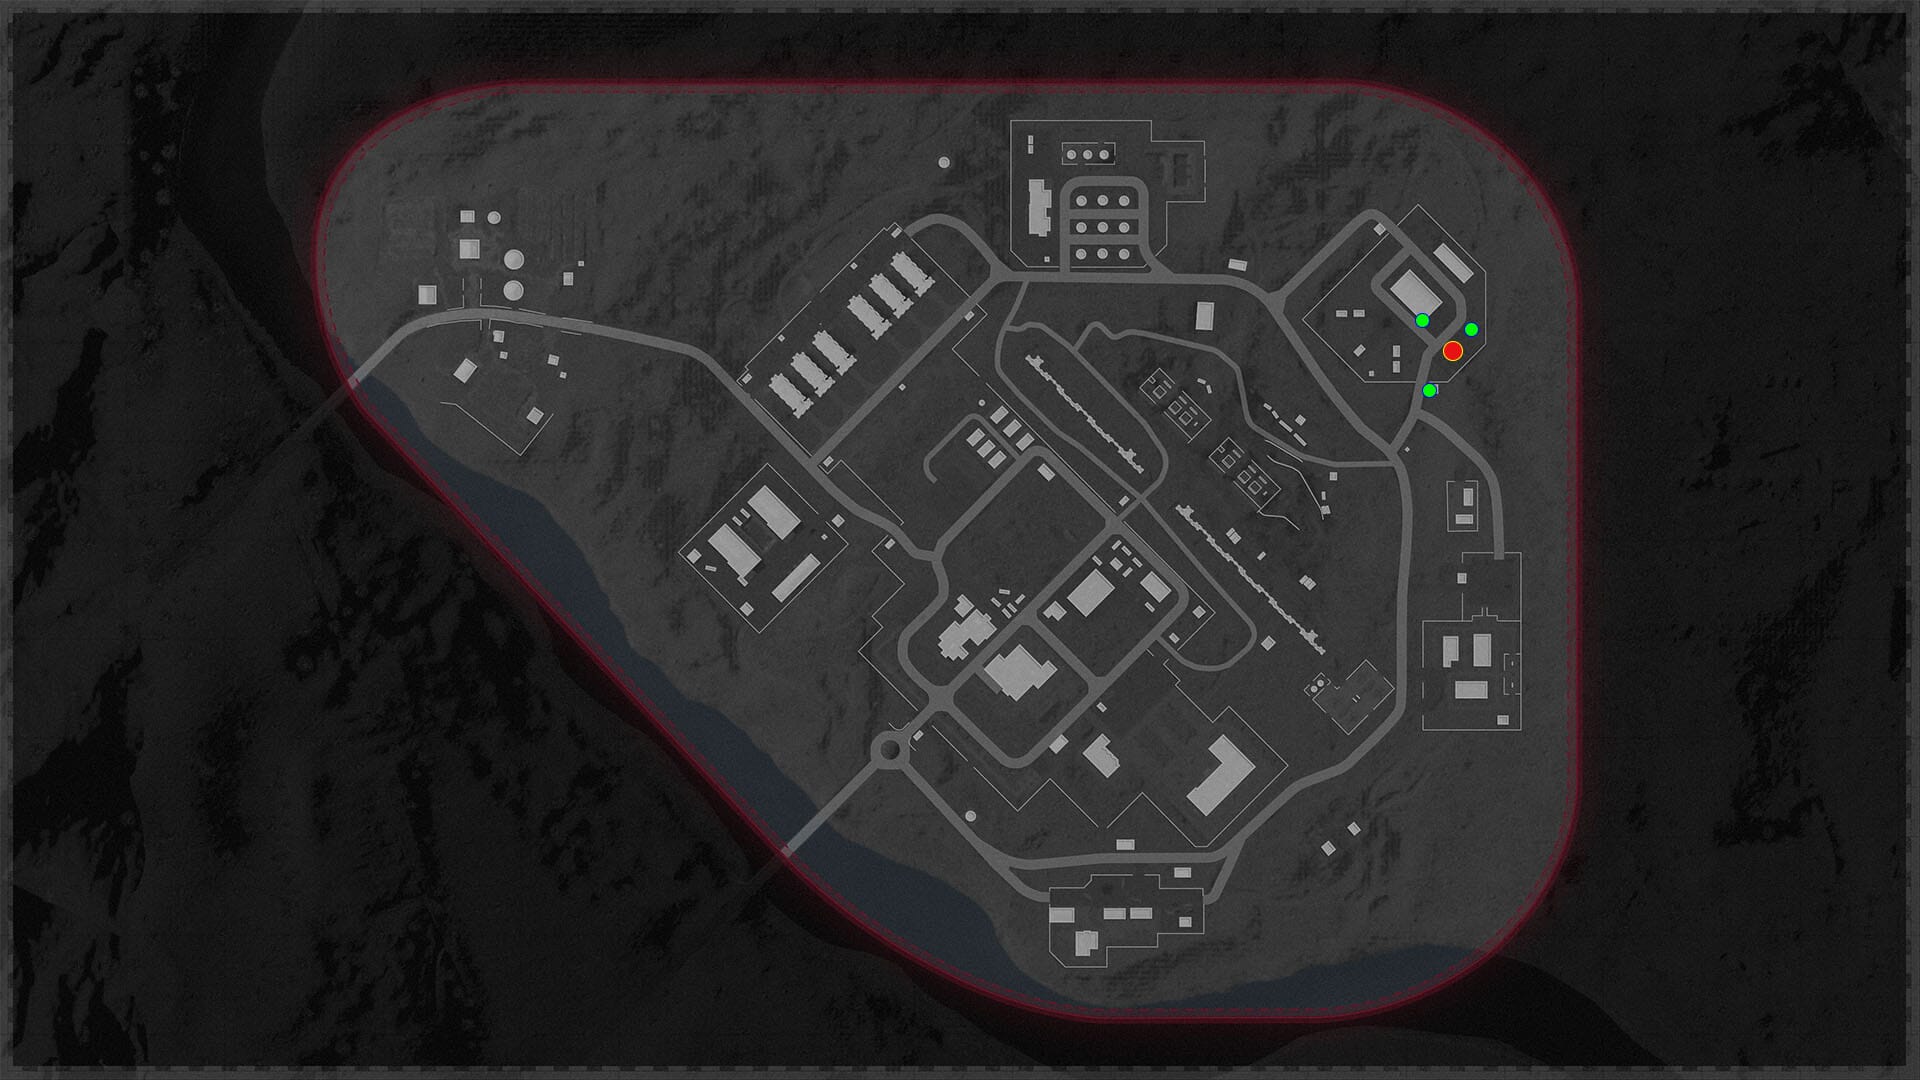
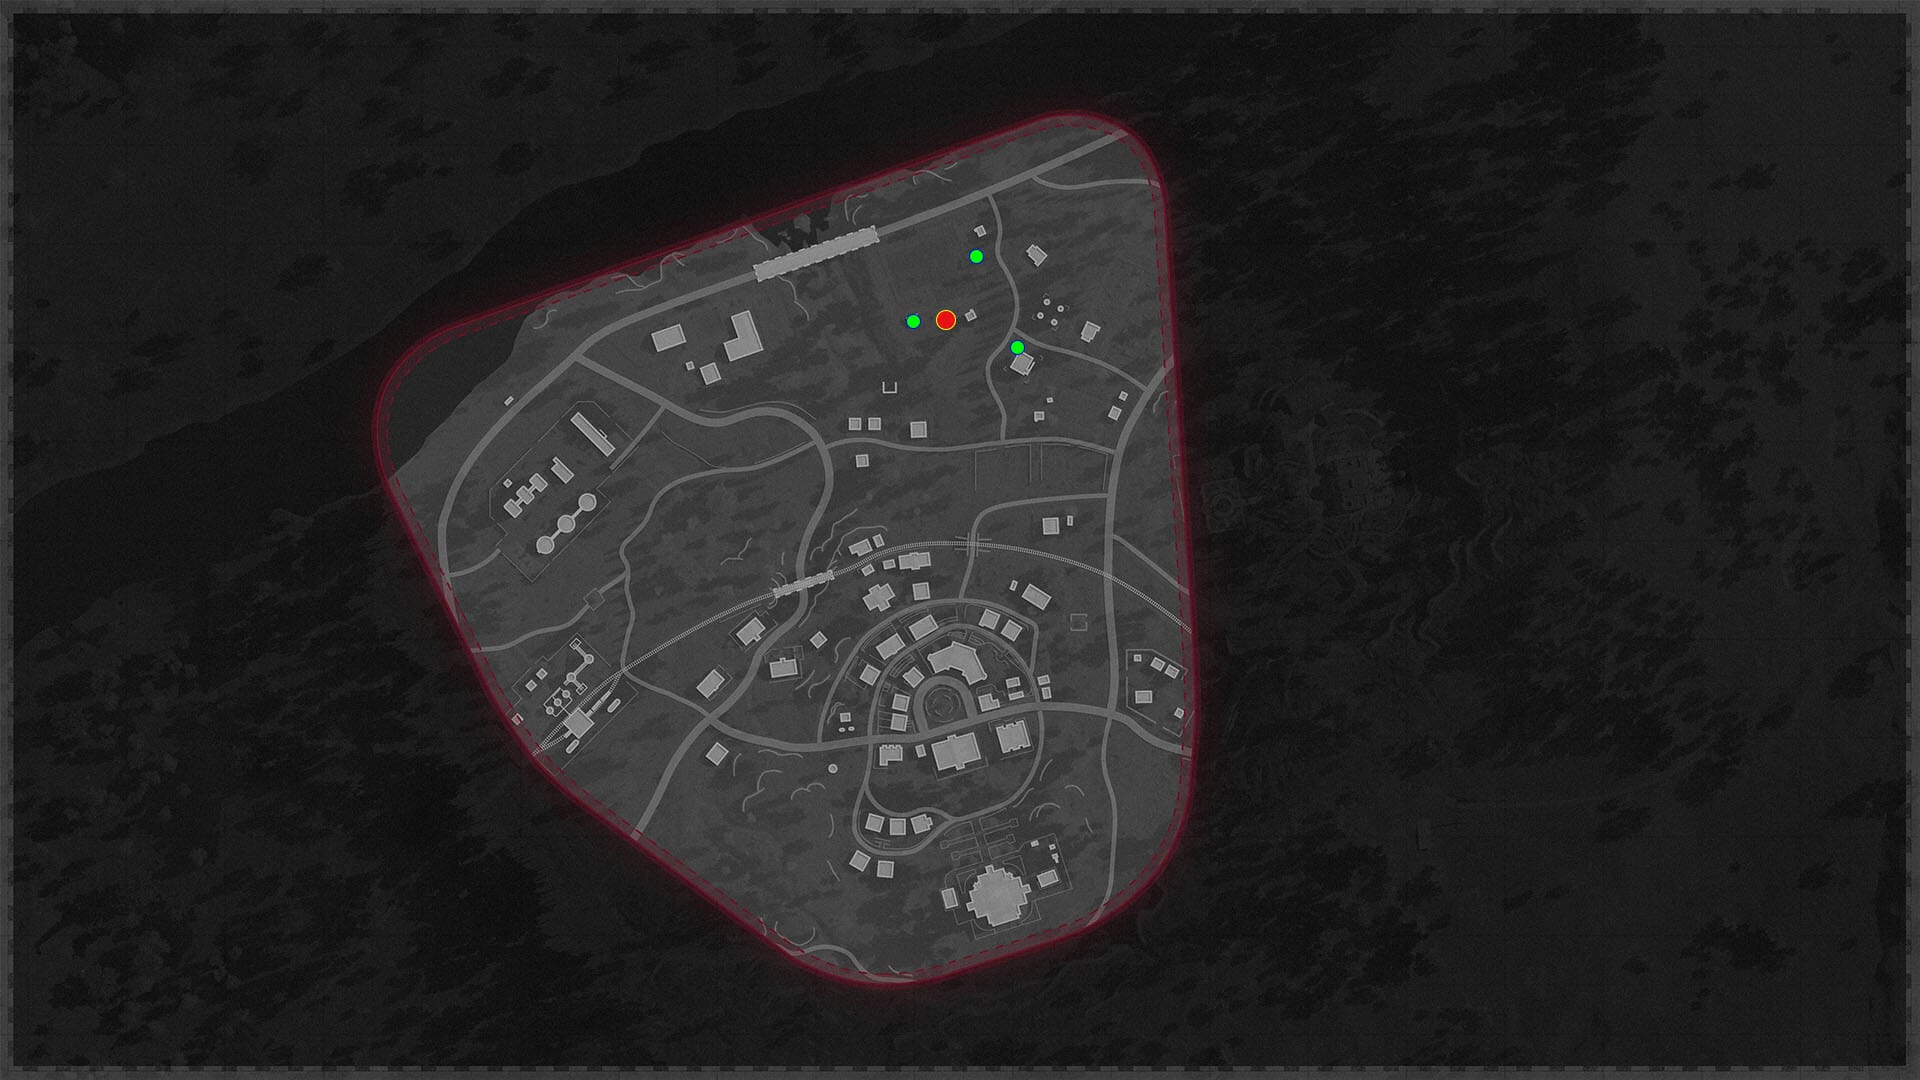
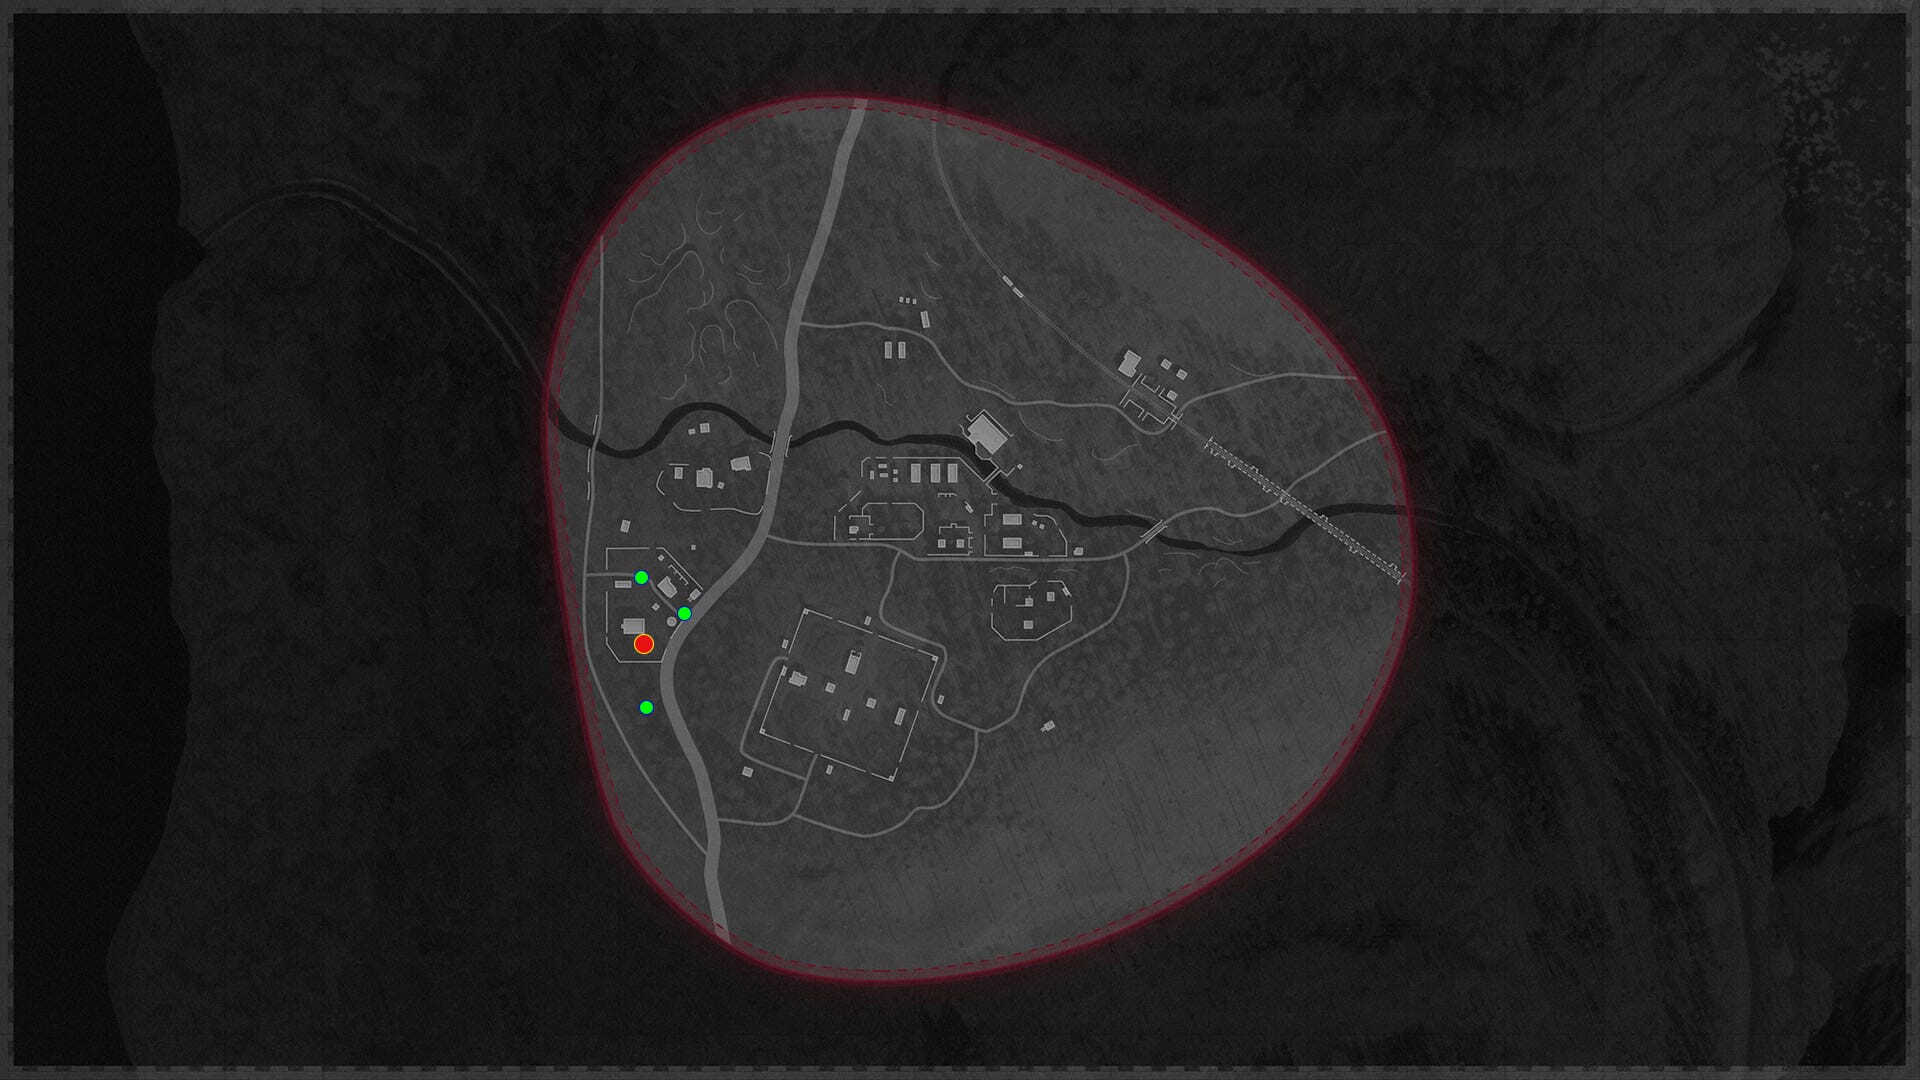
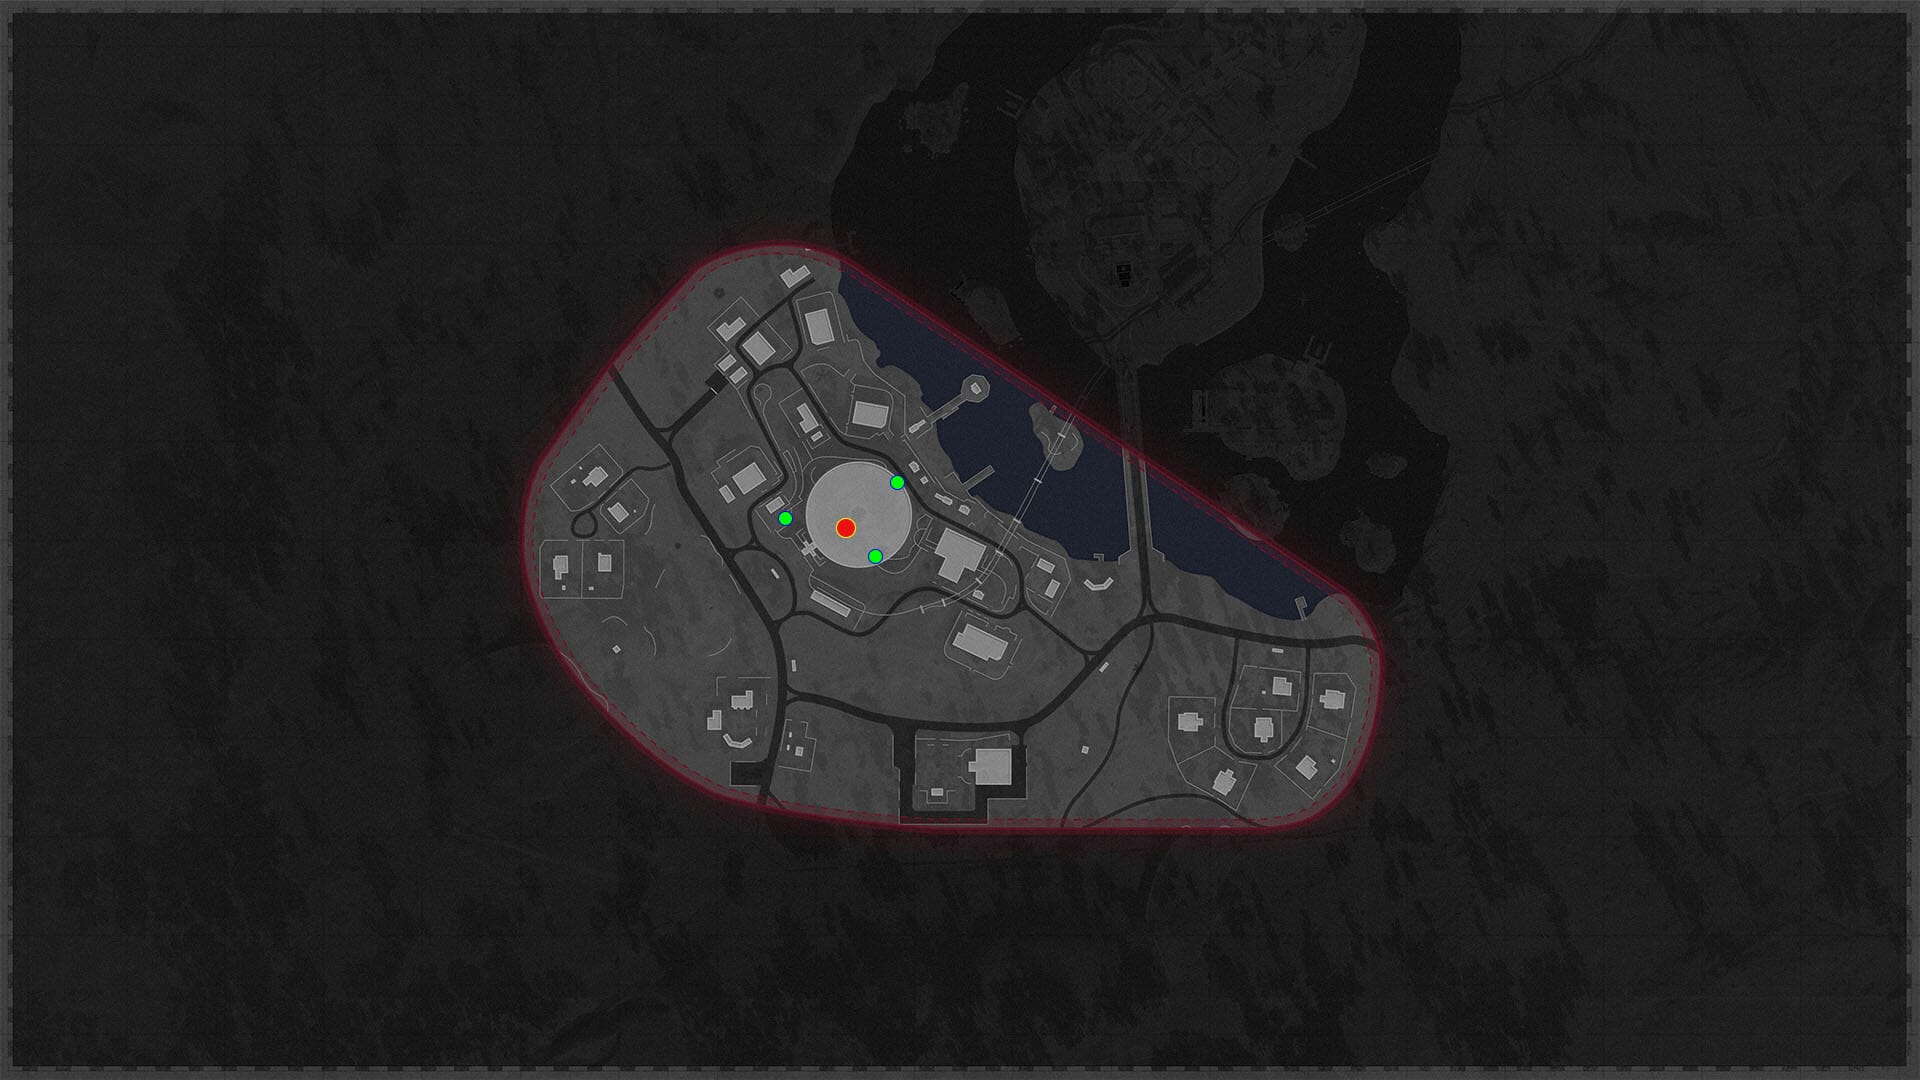
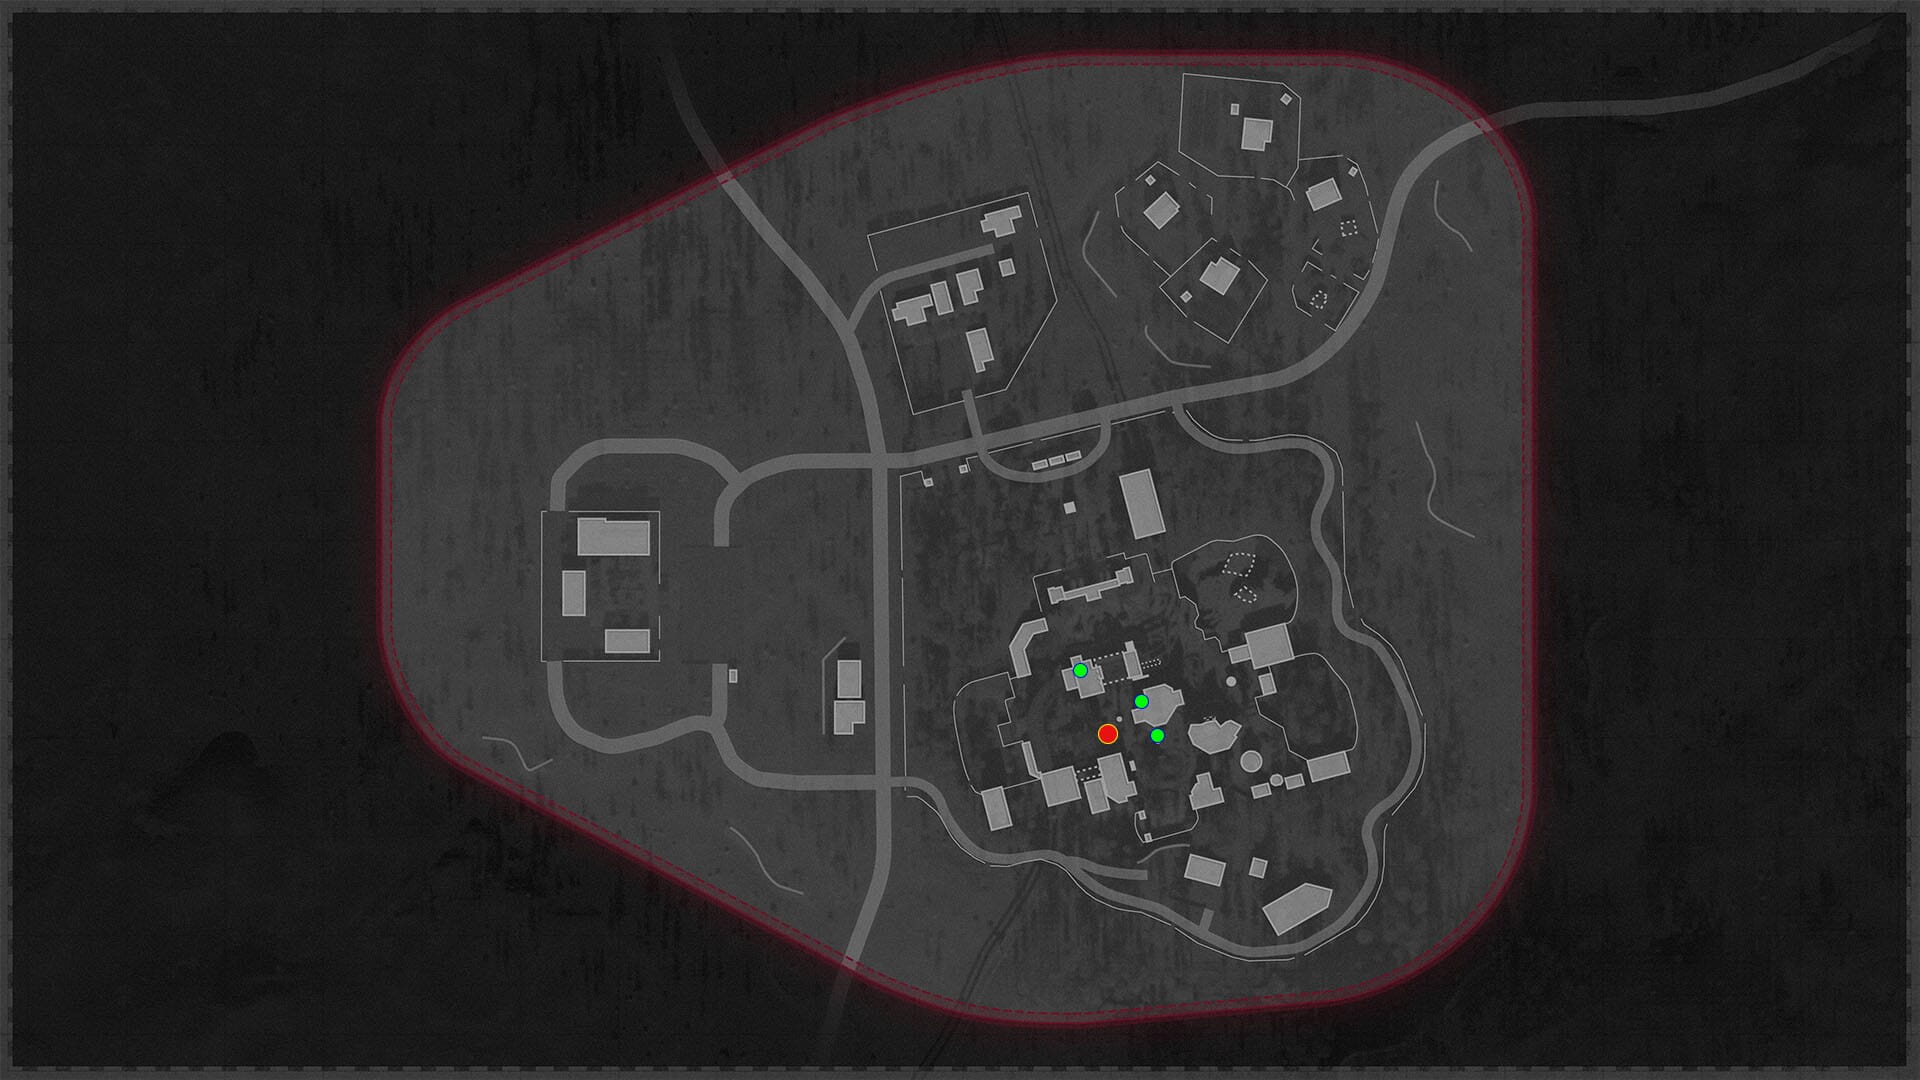
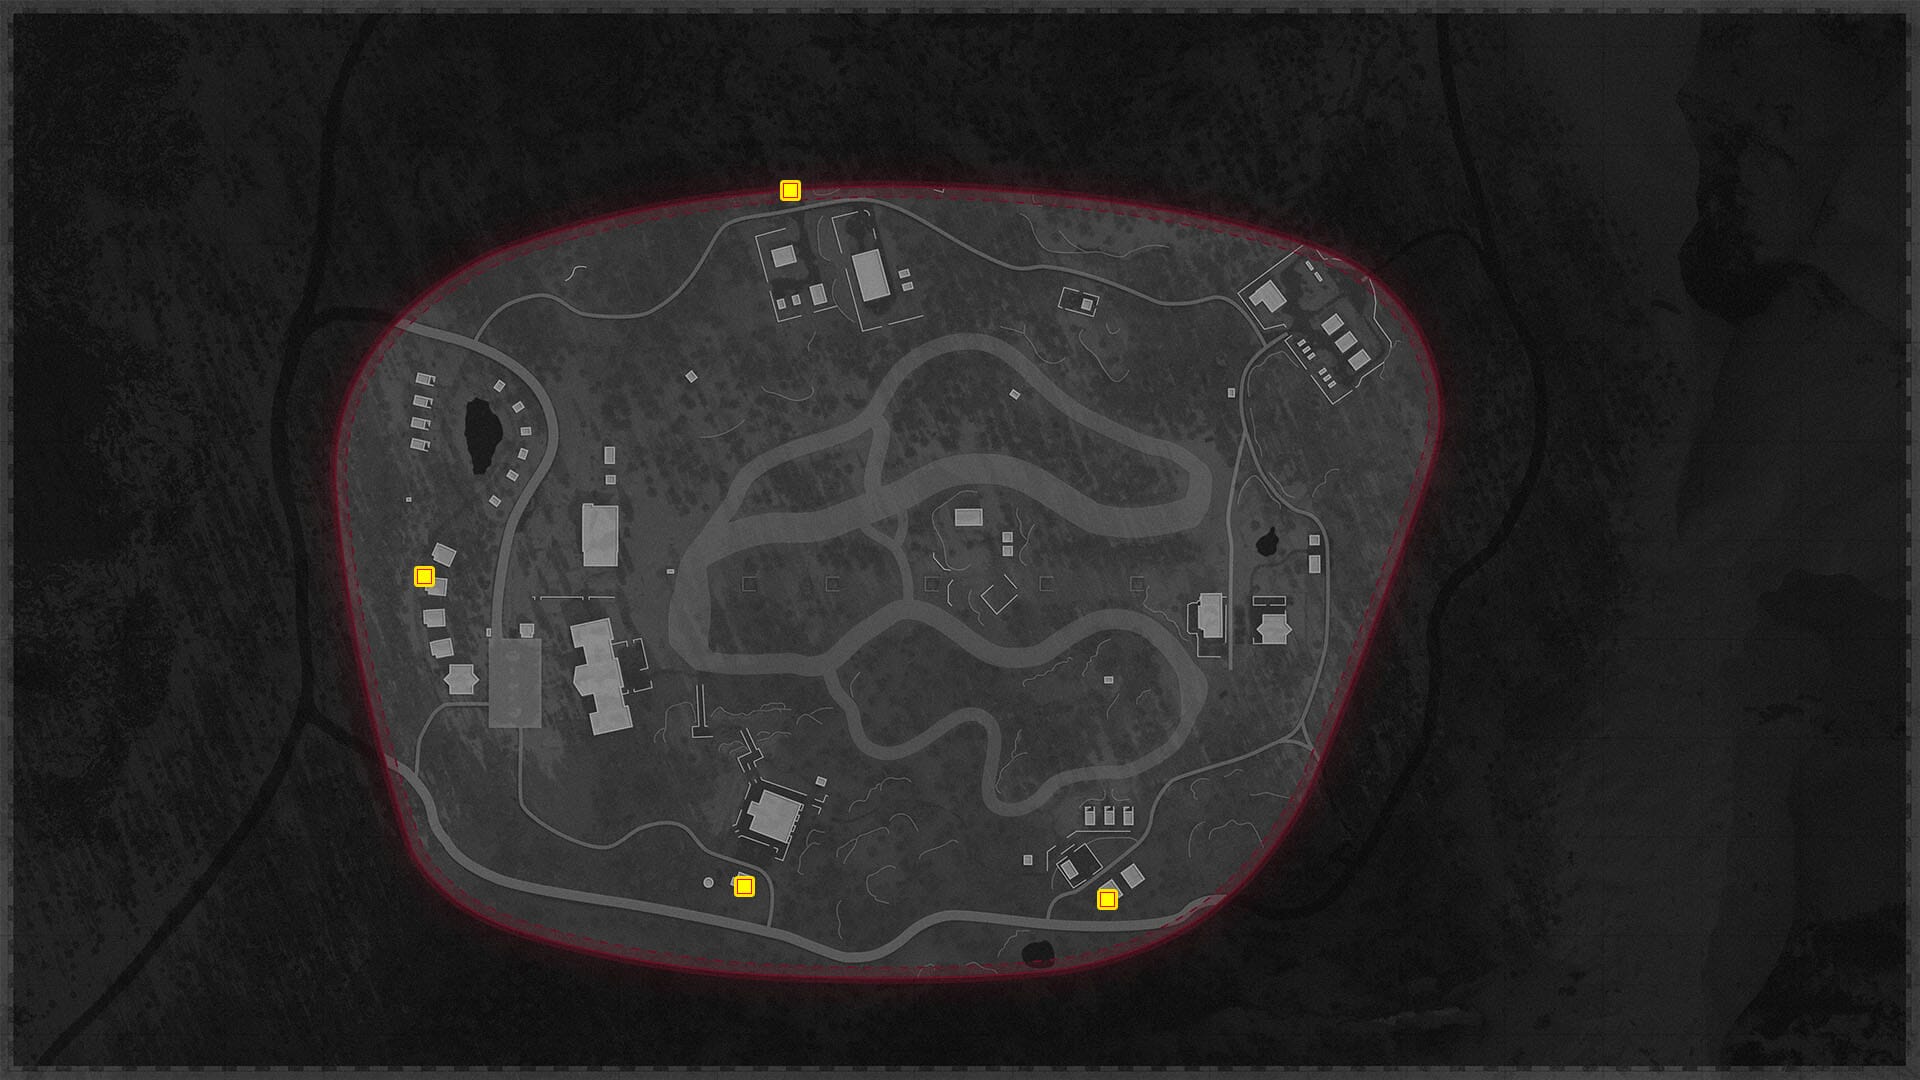
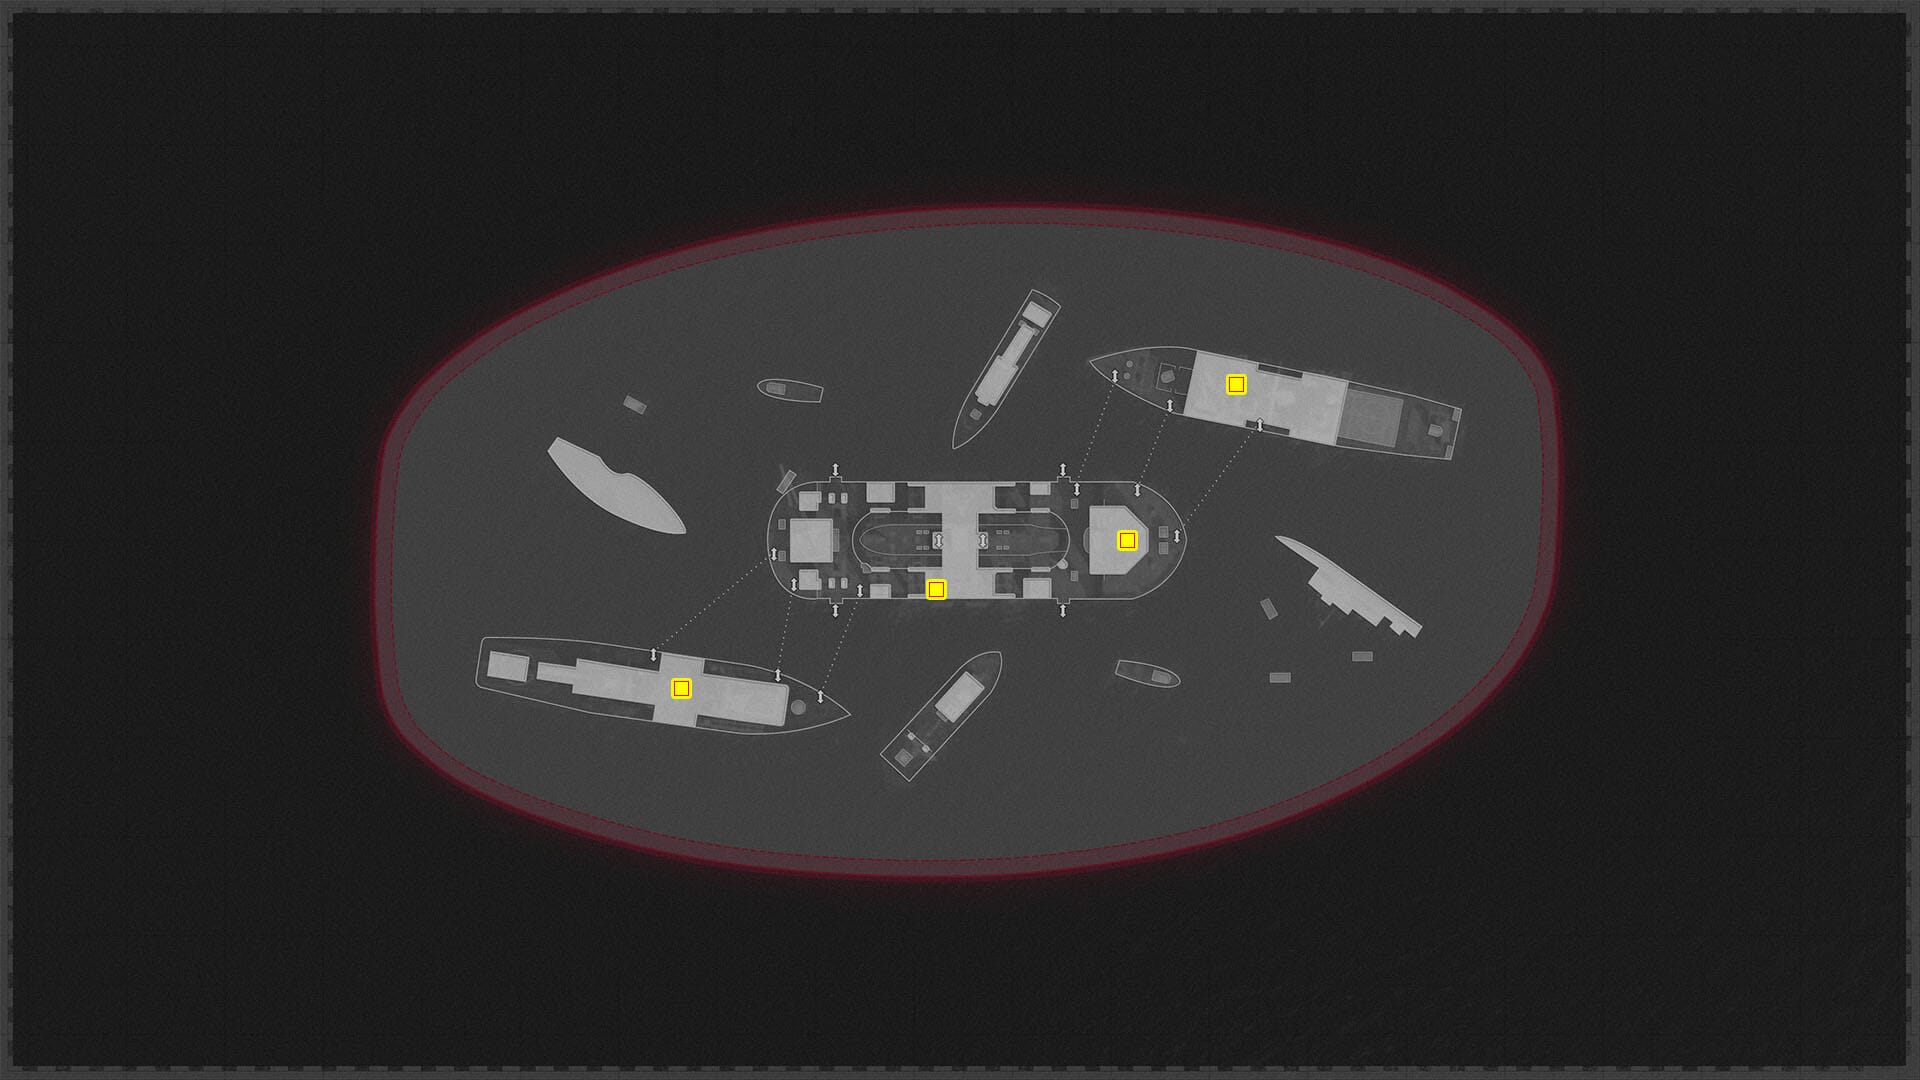
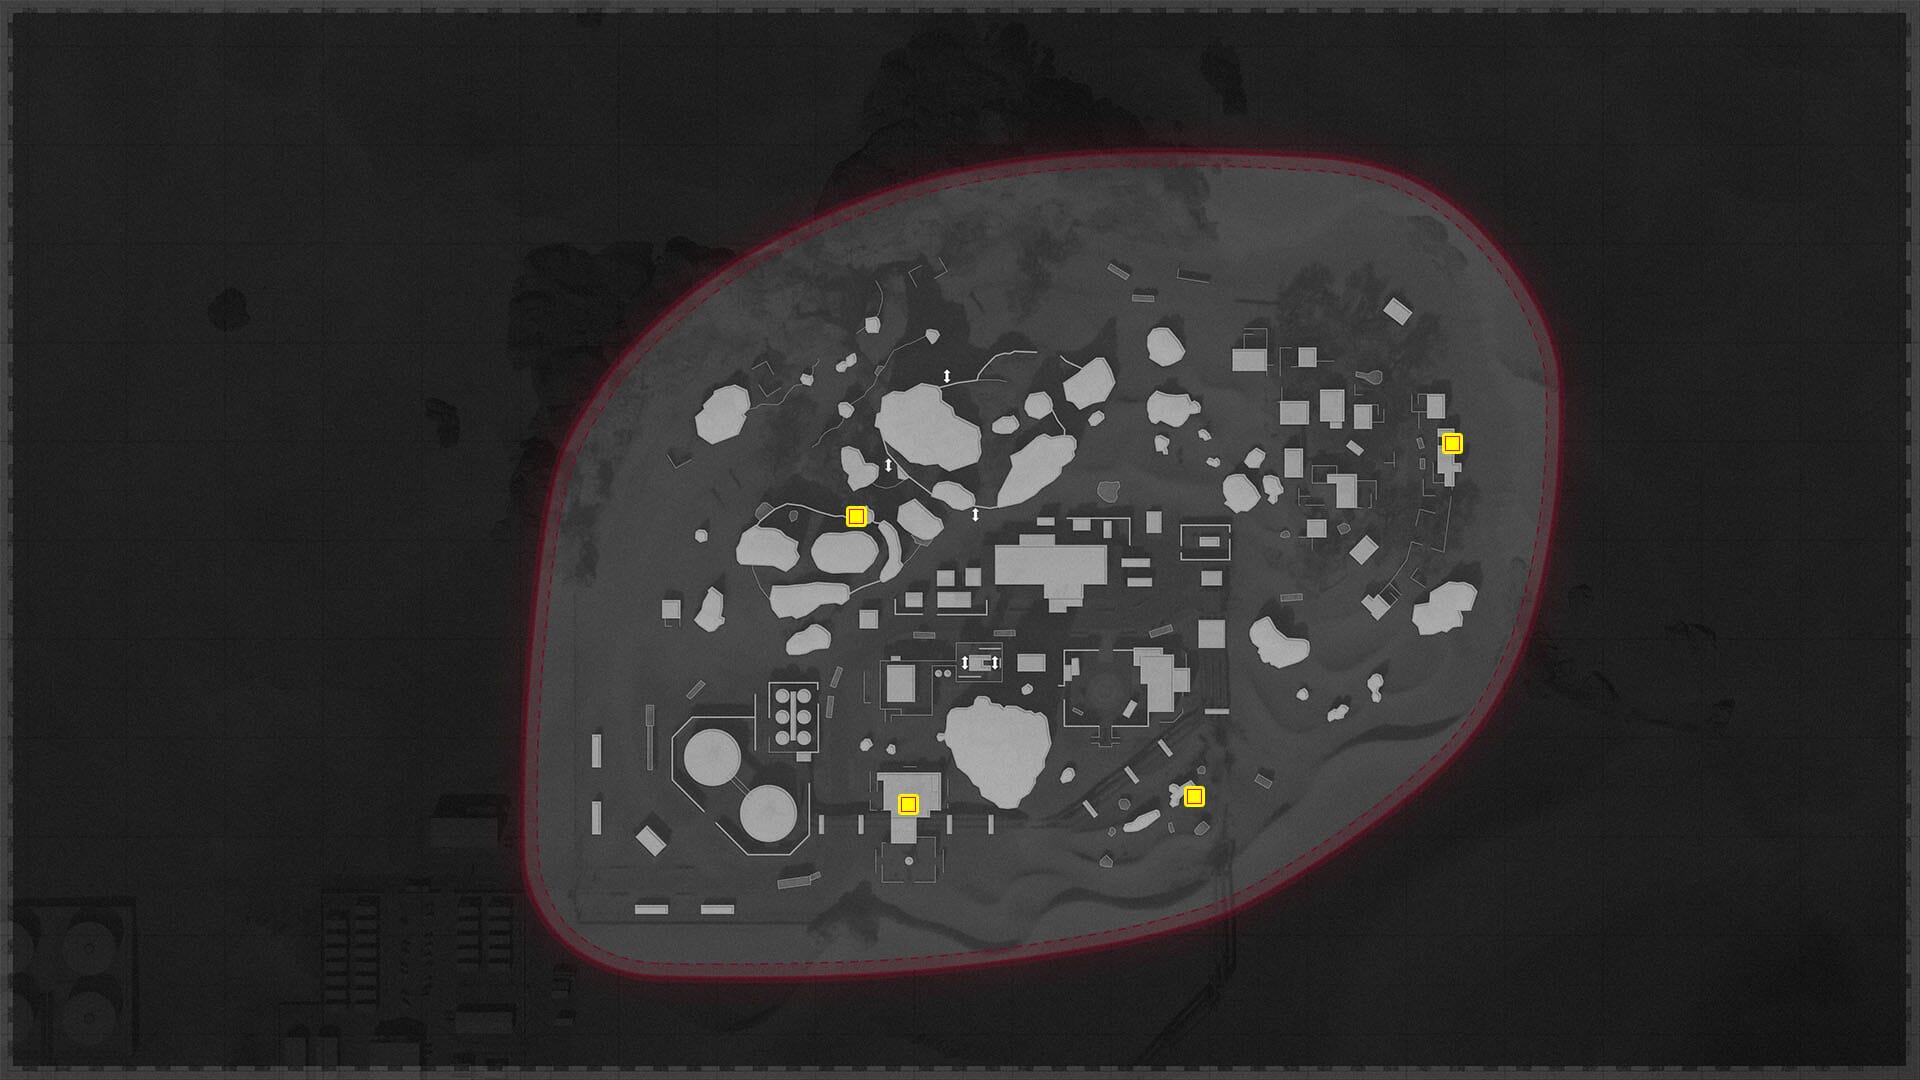
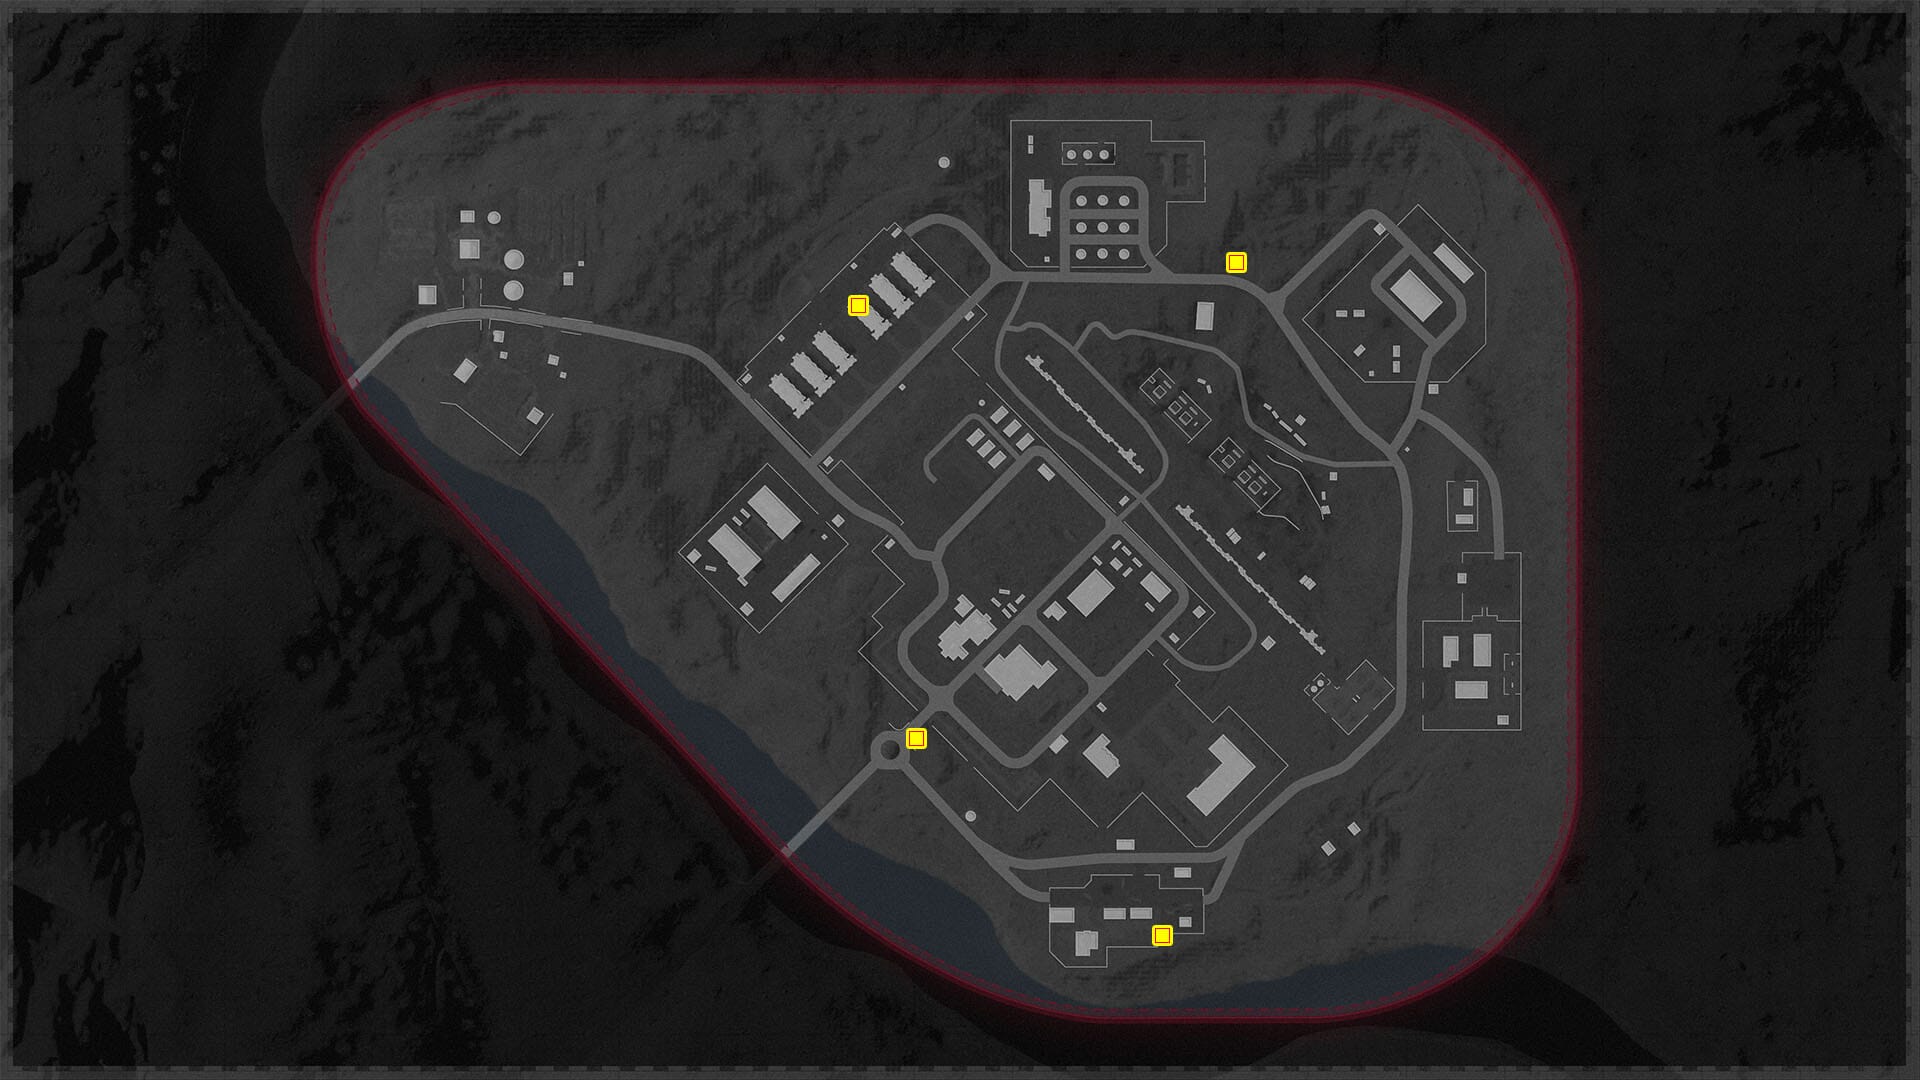
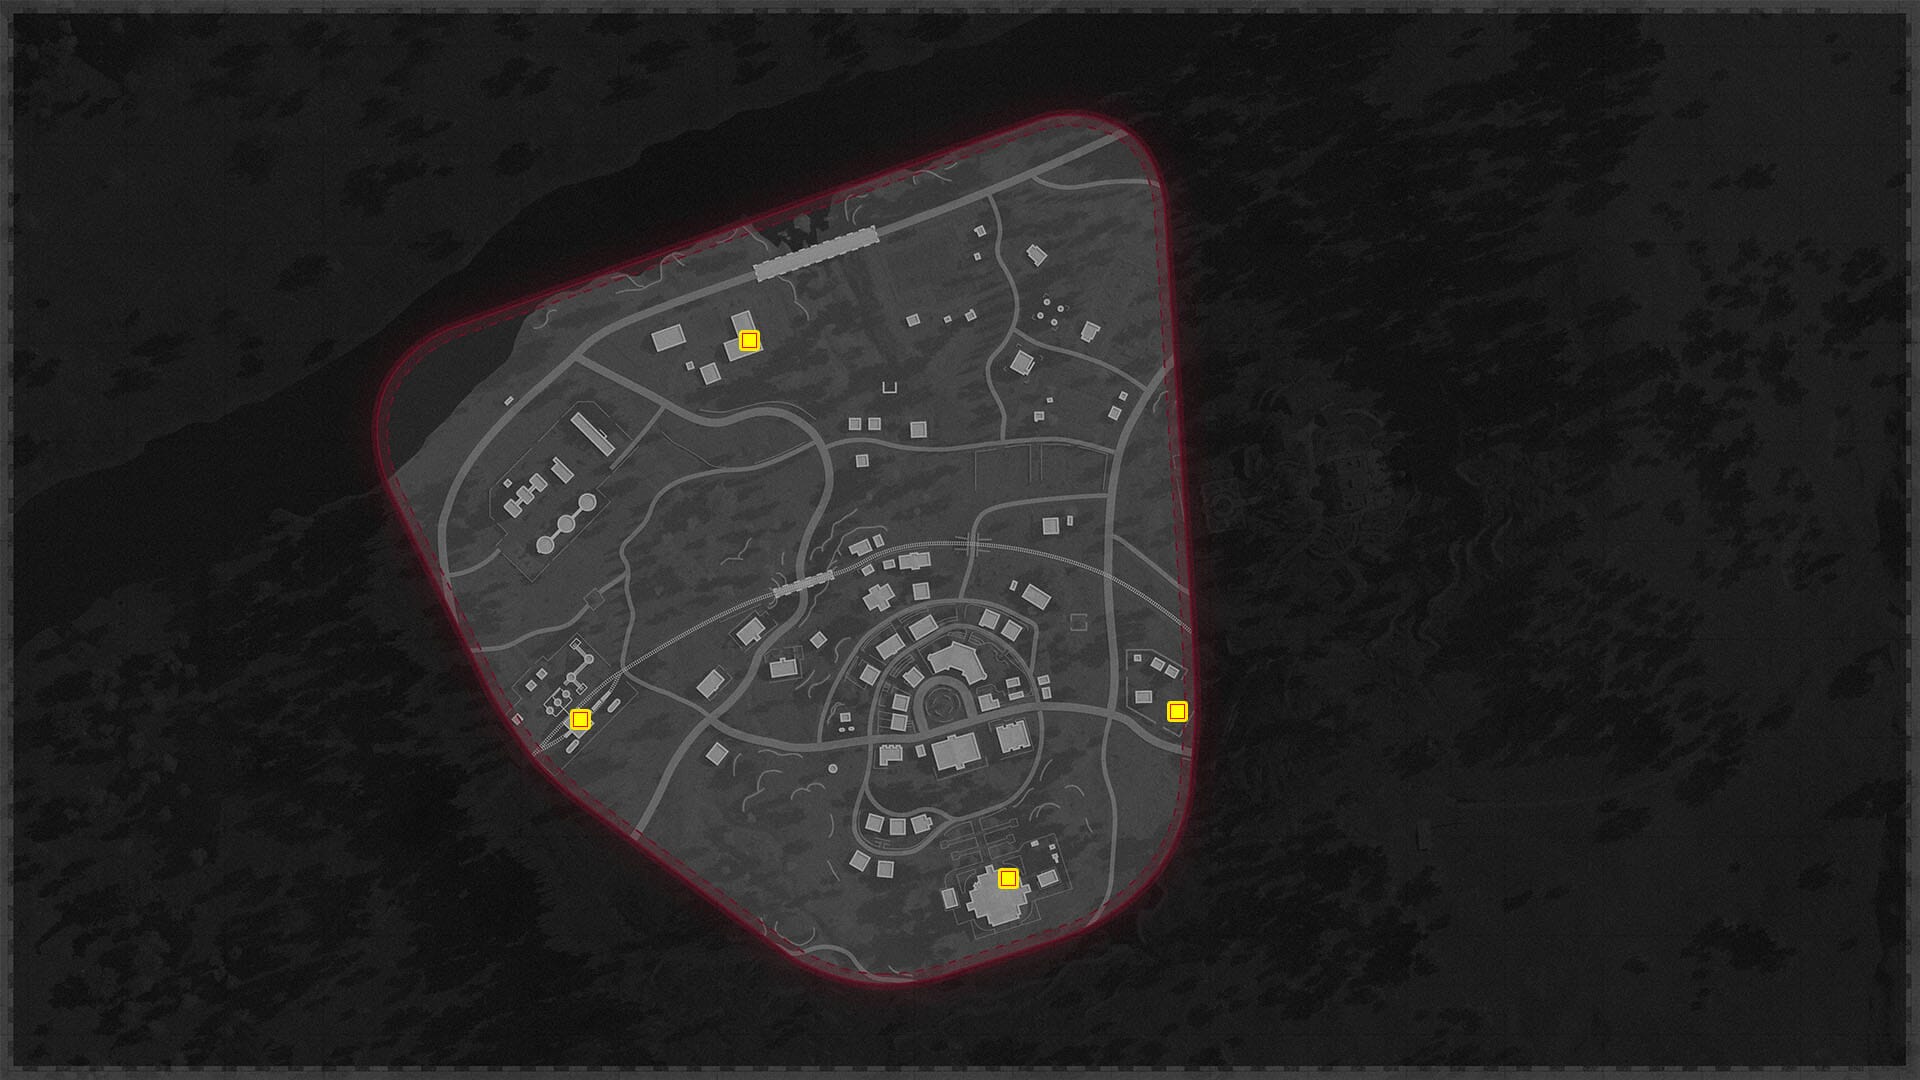
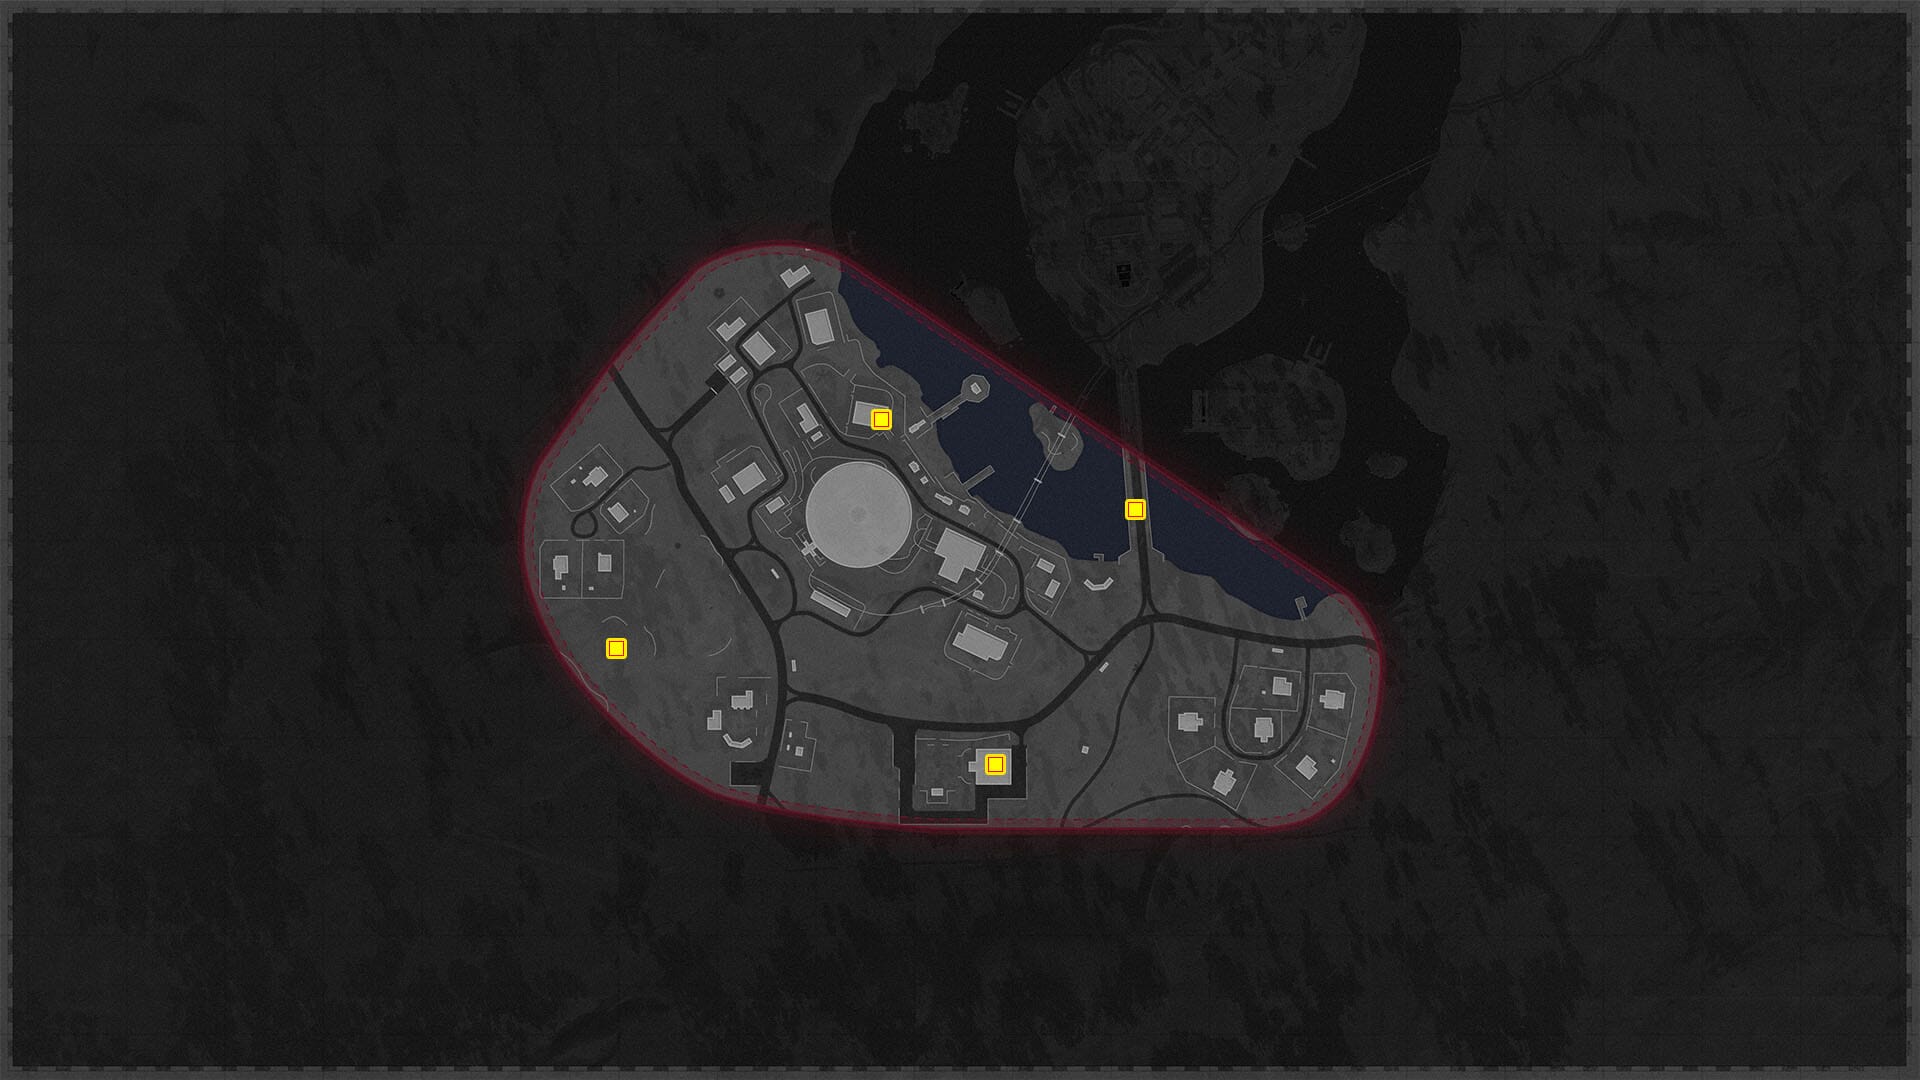
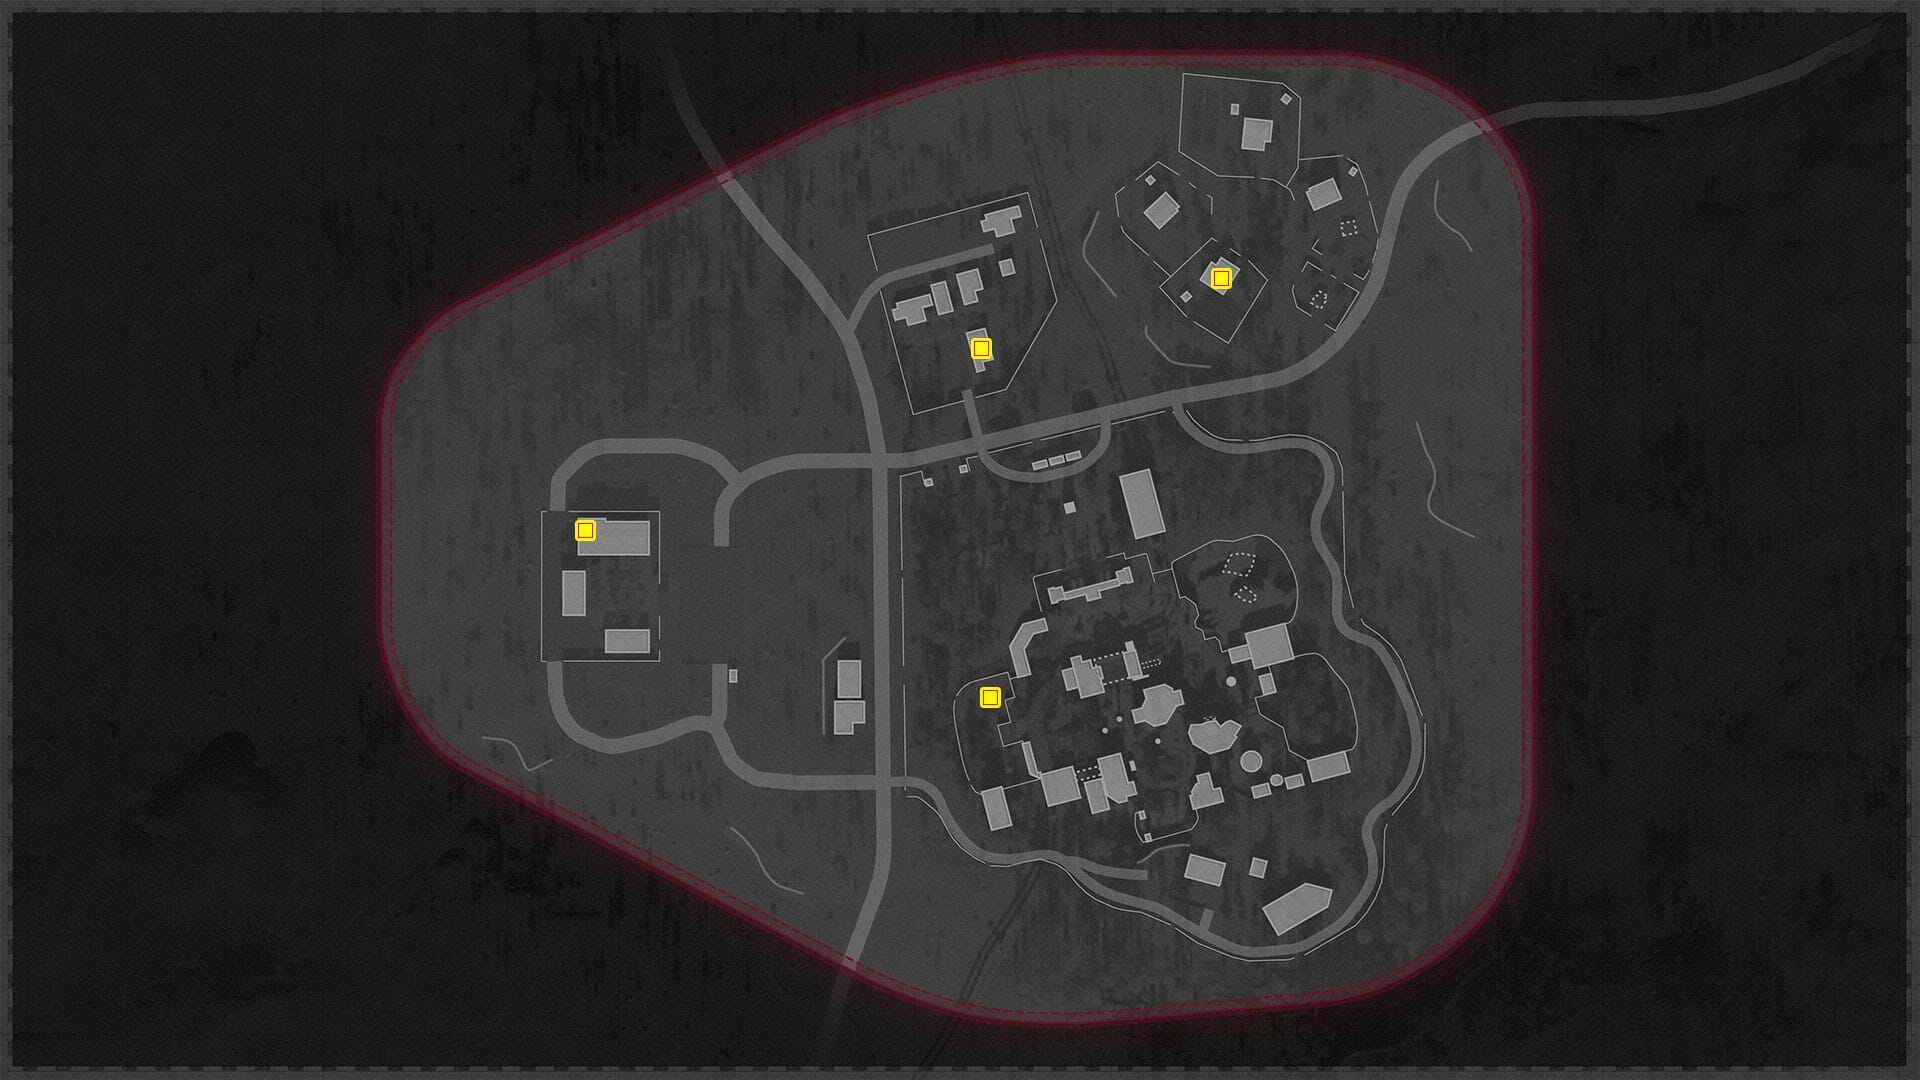
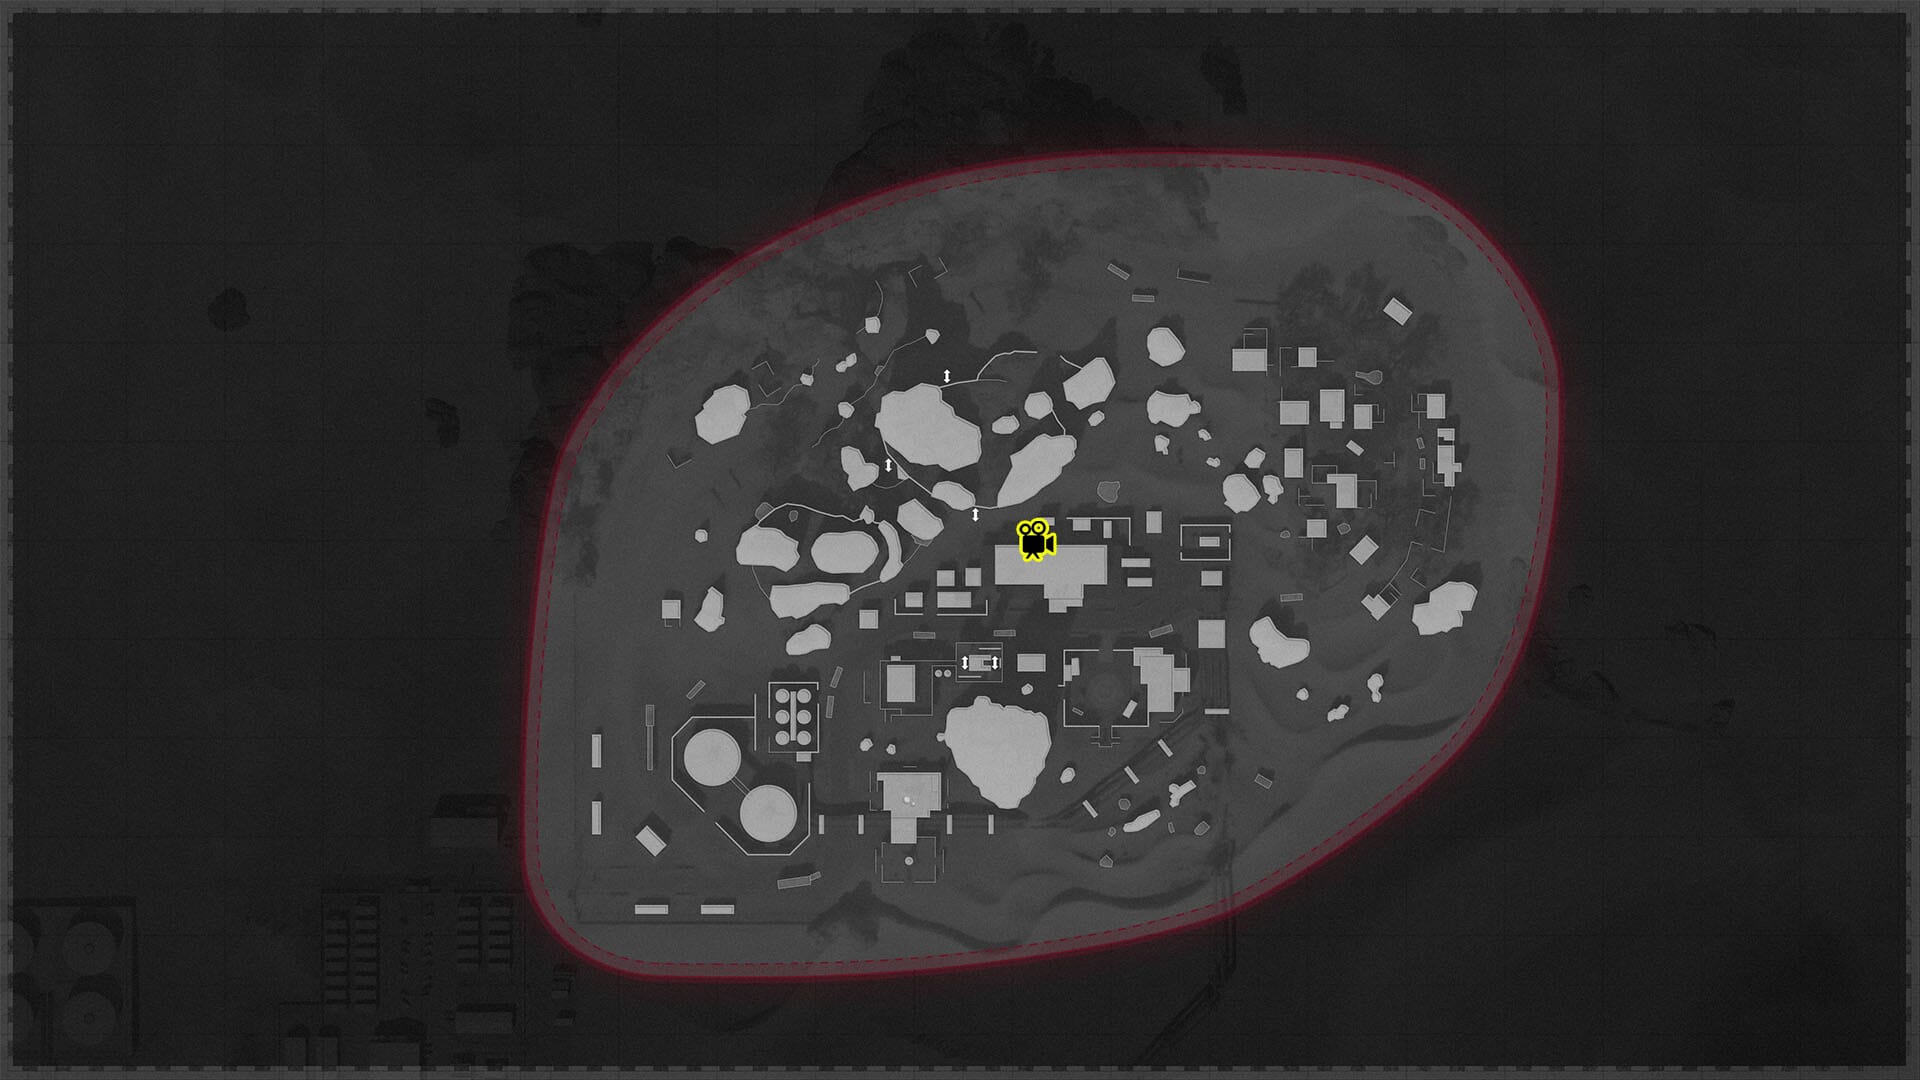
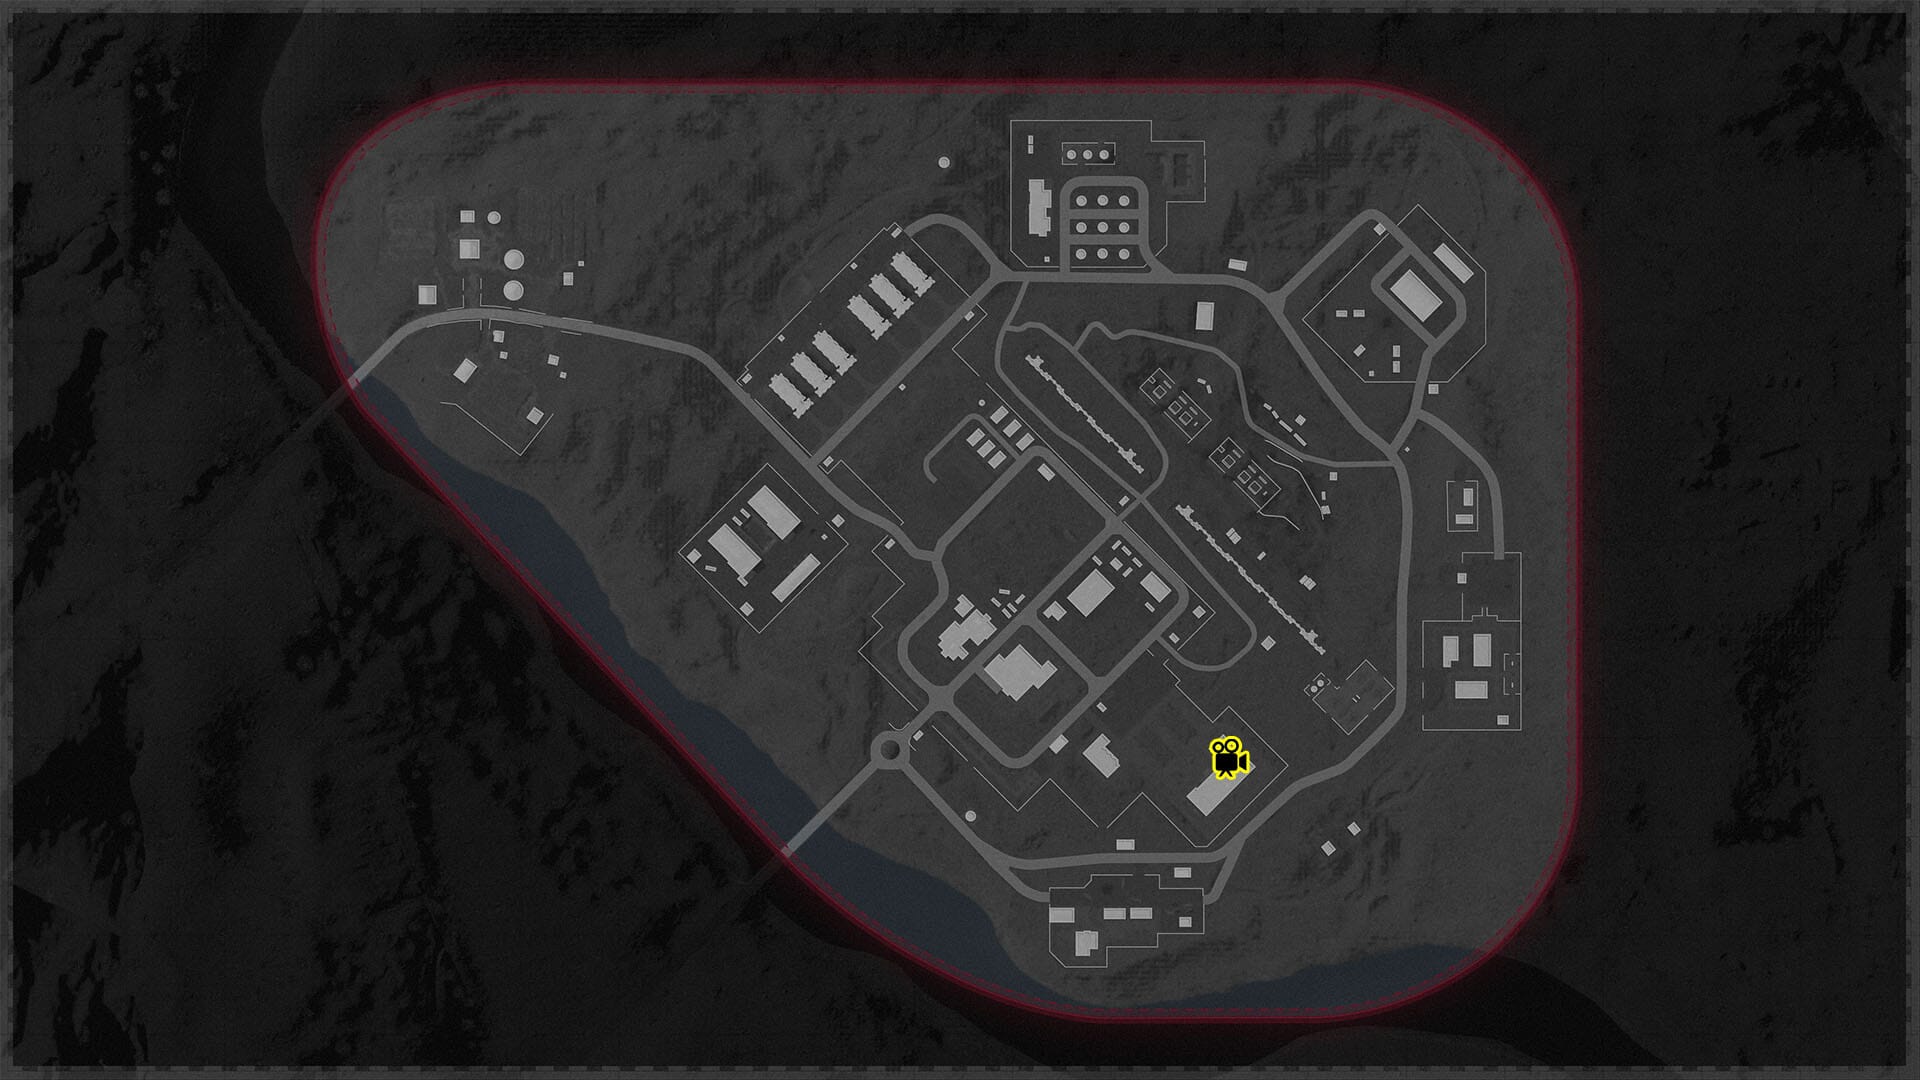
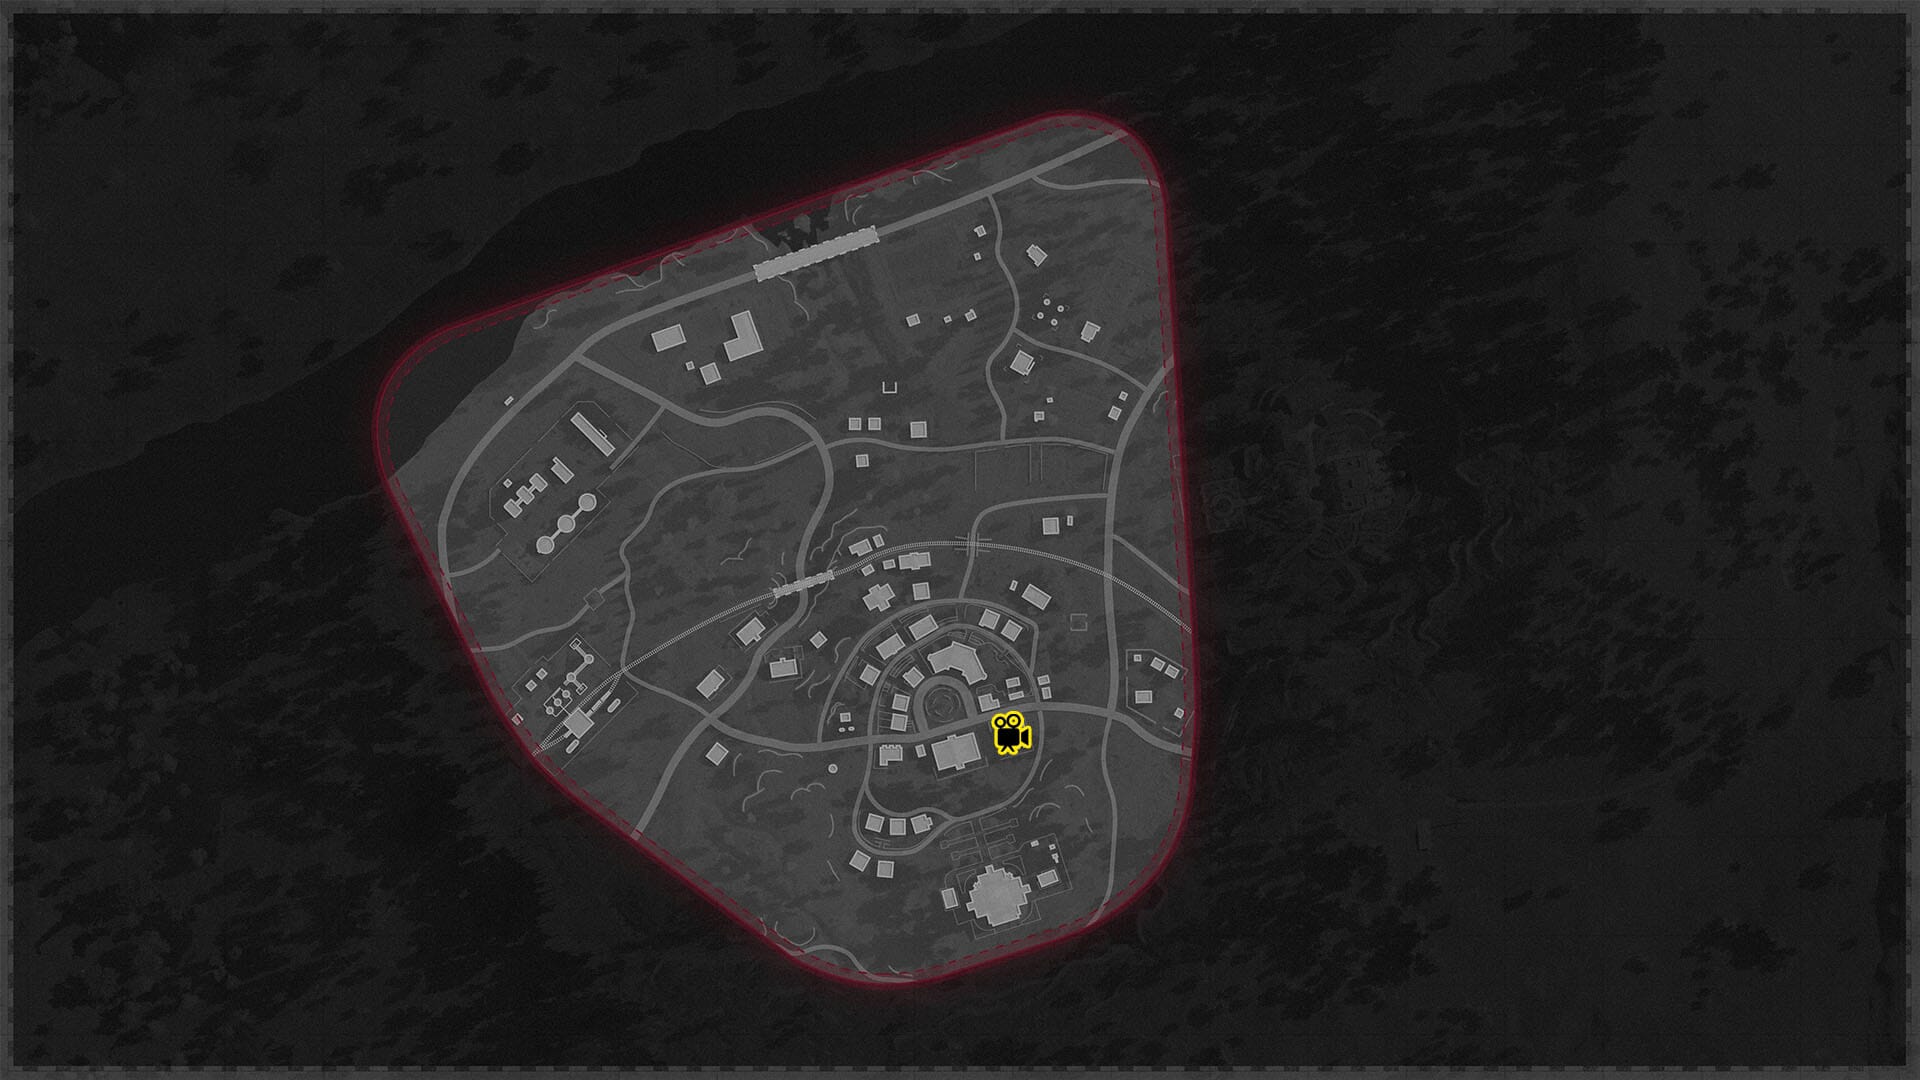
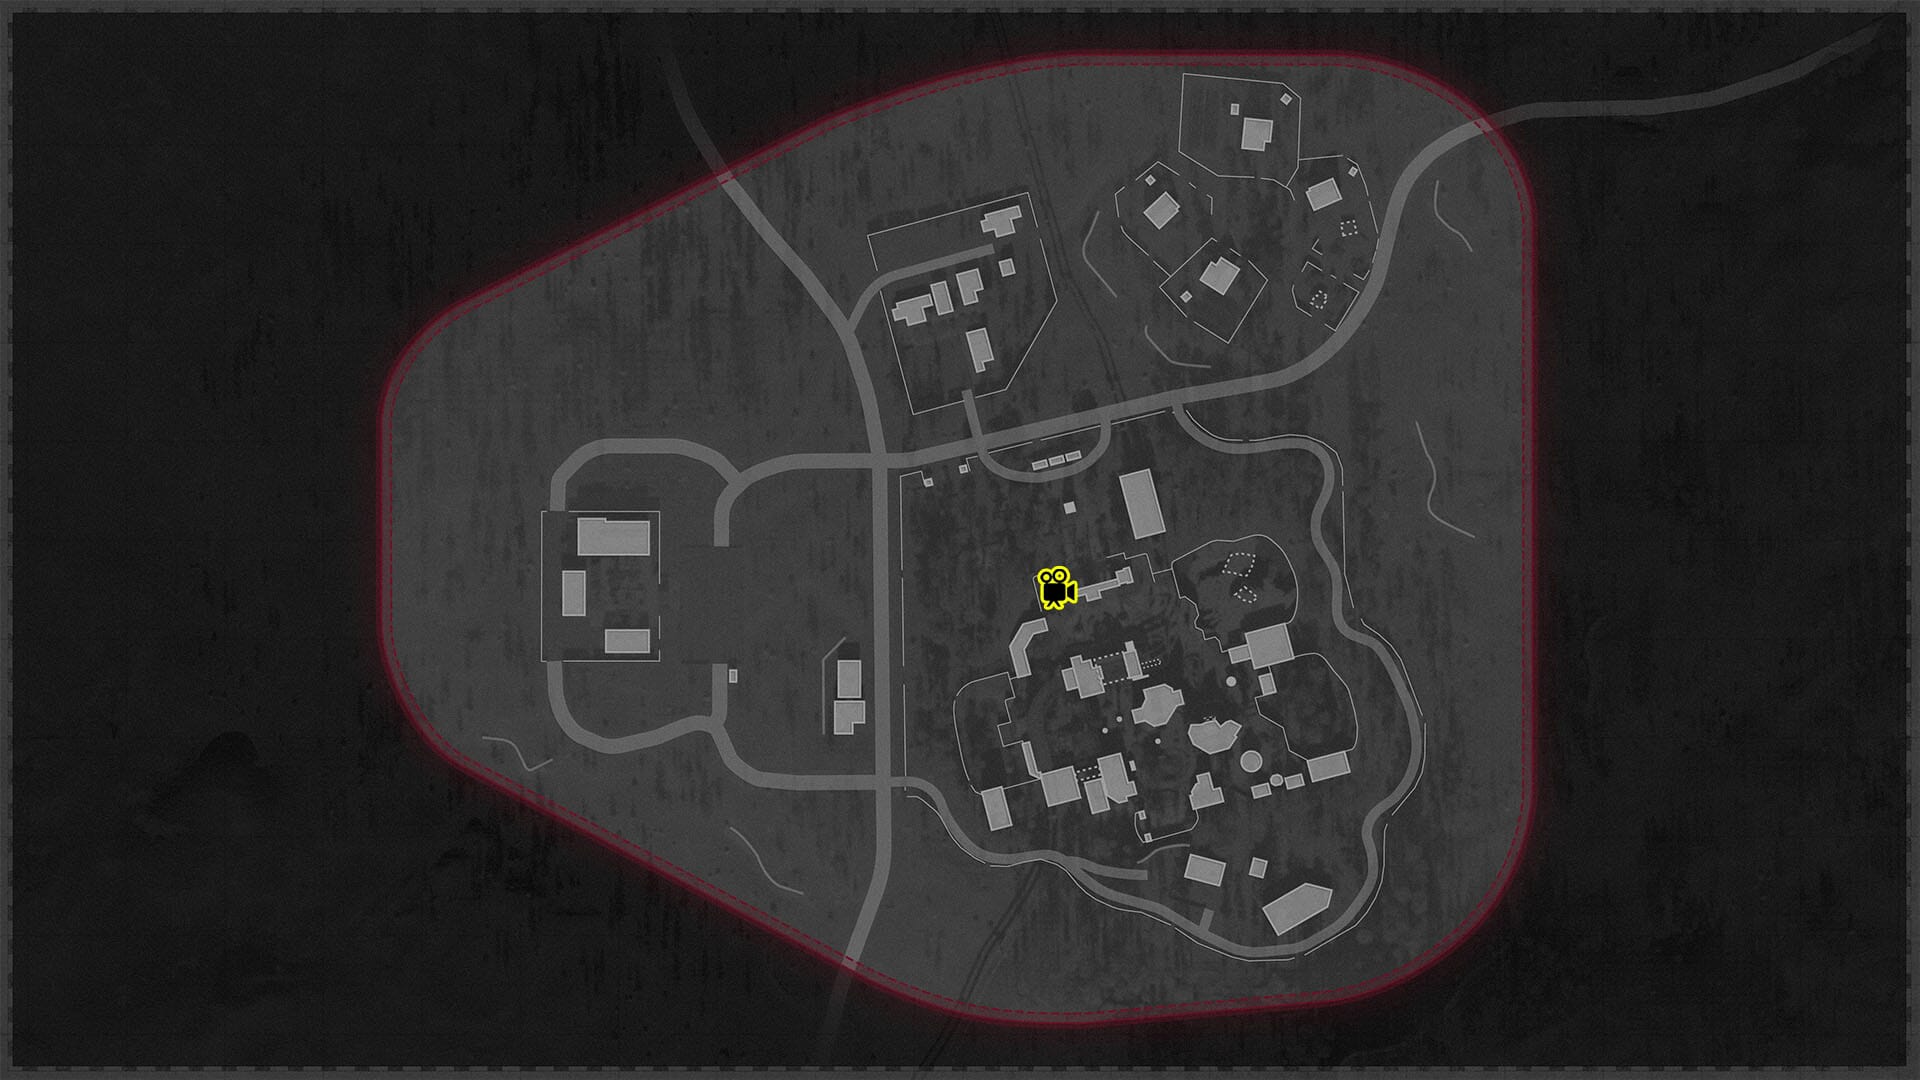
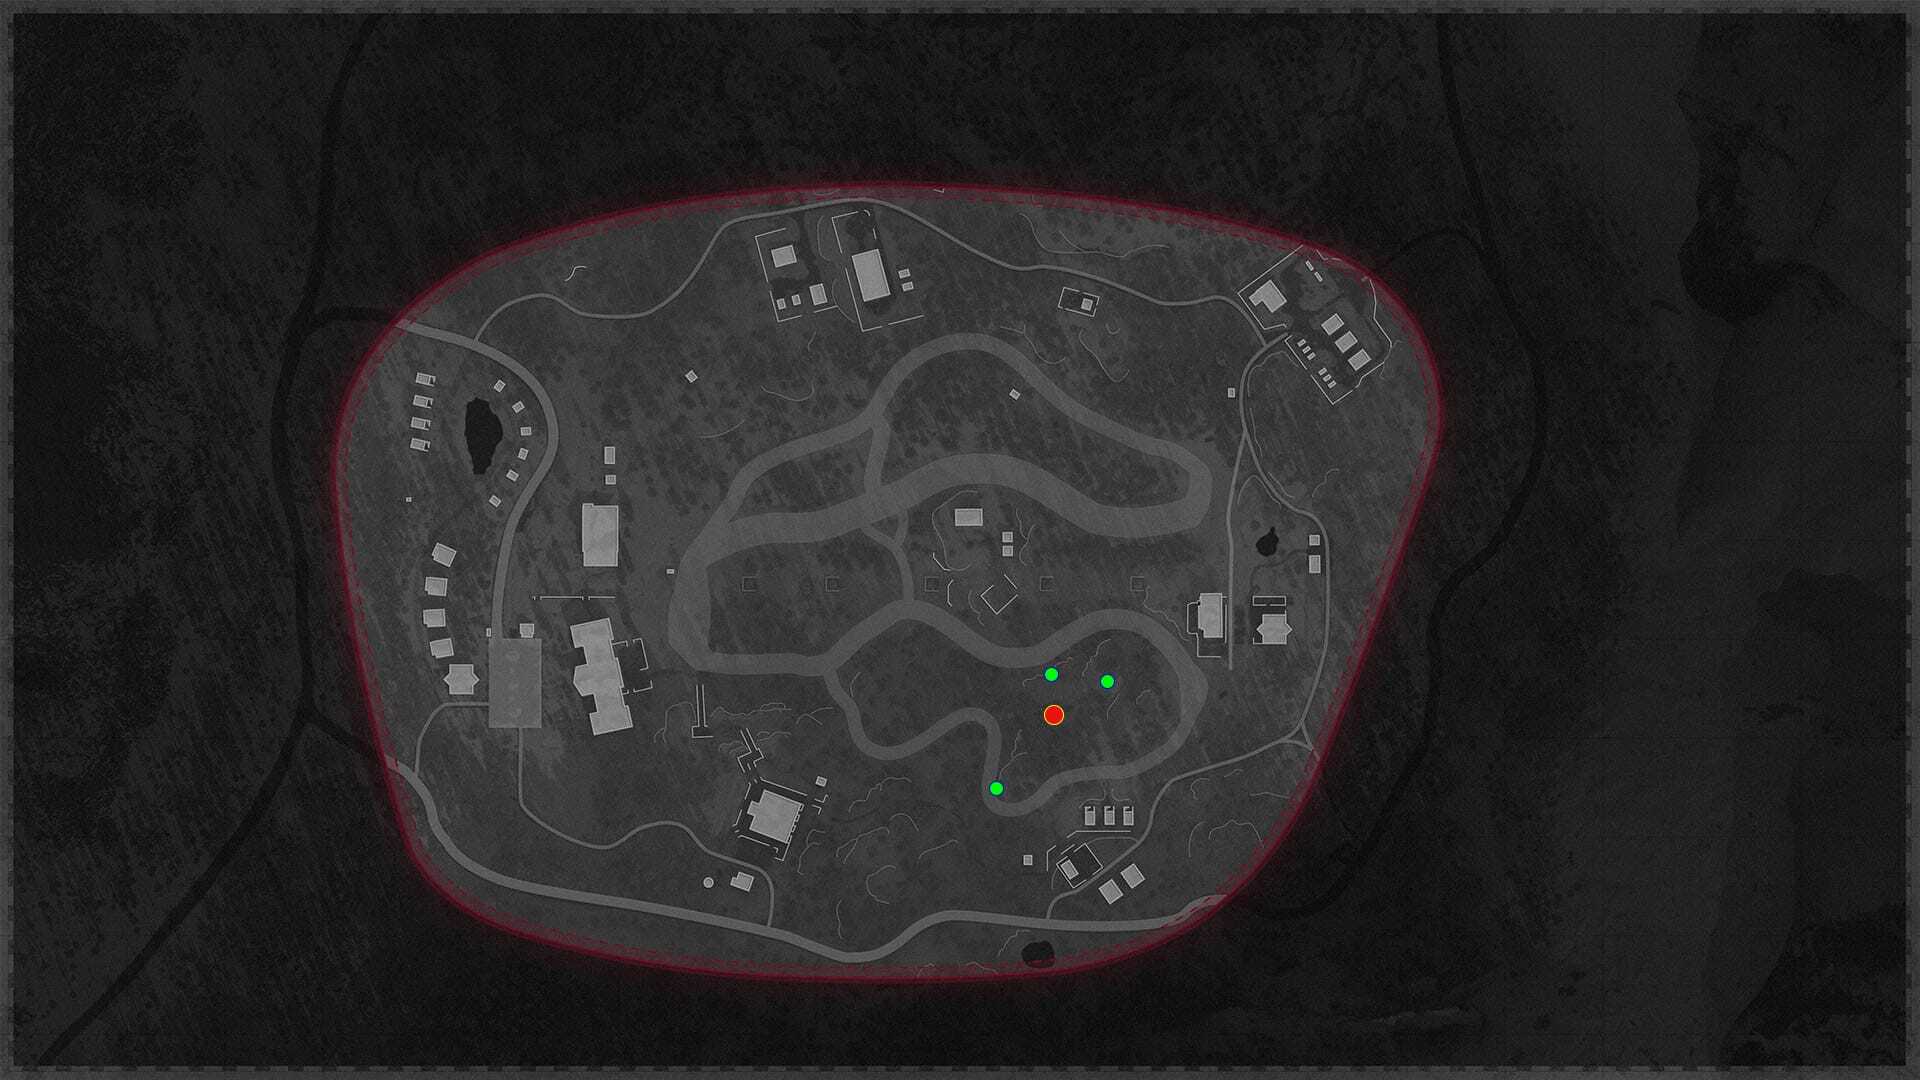
  • Find a Radio Transmitter. Locations based on the map you're on are as follows:
  • Using the maps above, find the radio amplifiers and tune them using the Radio Transmitter Solver below.

Radio Transmitter Solver

Enter the Active Static Noise number shown on the Radio Transmitter. It will be stored for reference while tuning the amplifiers.

Step 4: Obtain the Beacon Part 2

  • Once the amplifiers are tuned, head back to the Radio Transmitter and interact with it.
  • Once the beacon is active, head to it and press the call button.
  • Teleport to the next world.

Step 5: World 4 Set Up

  • Do all map objectives.
  • OPTIONAL! Complete a Trial.

Step 6: Learn about Operation Inversyia

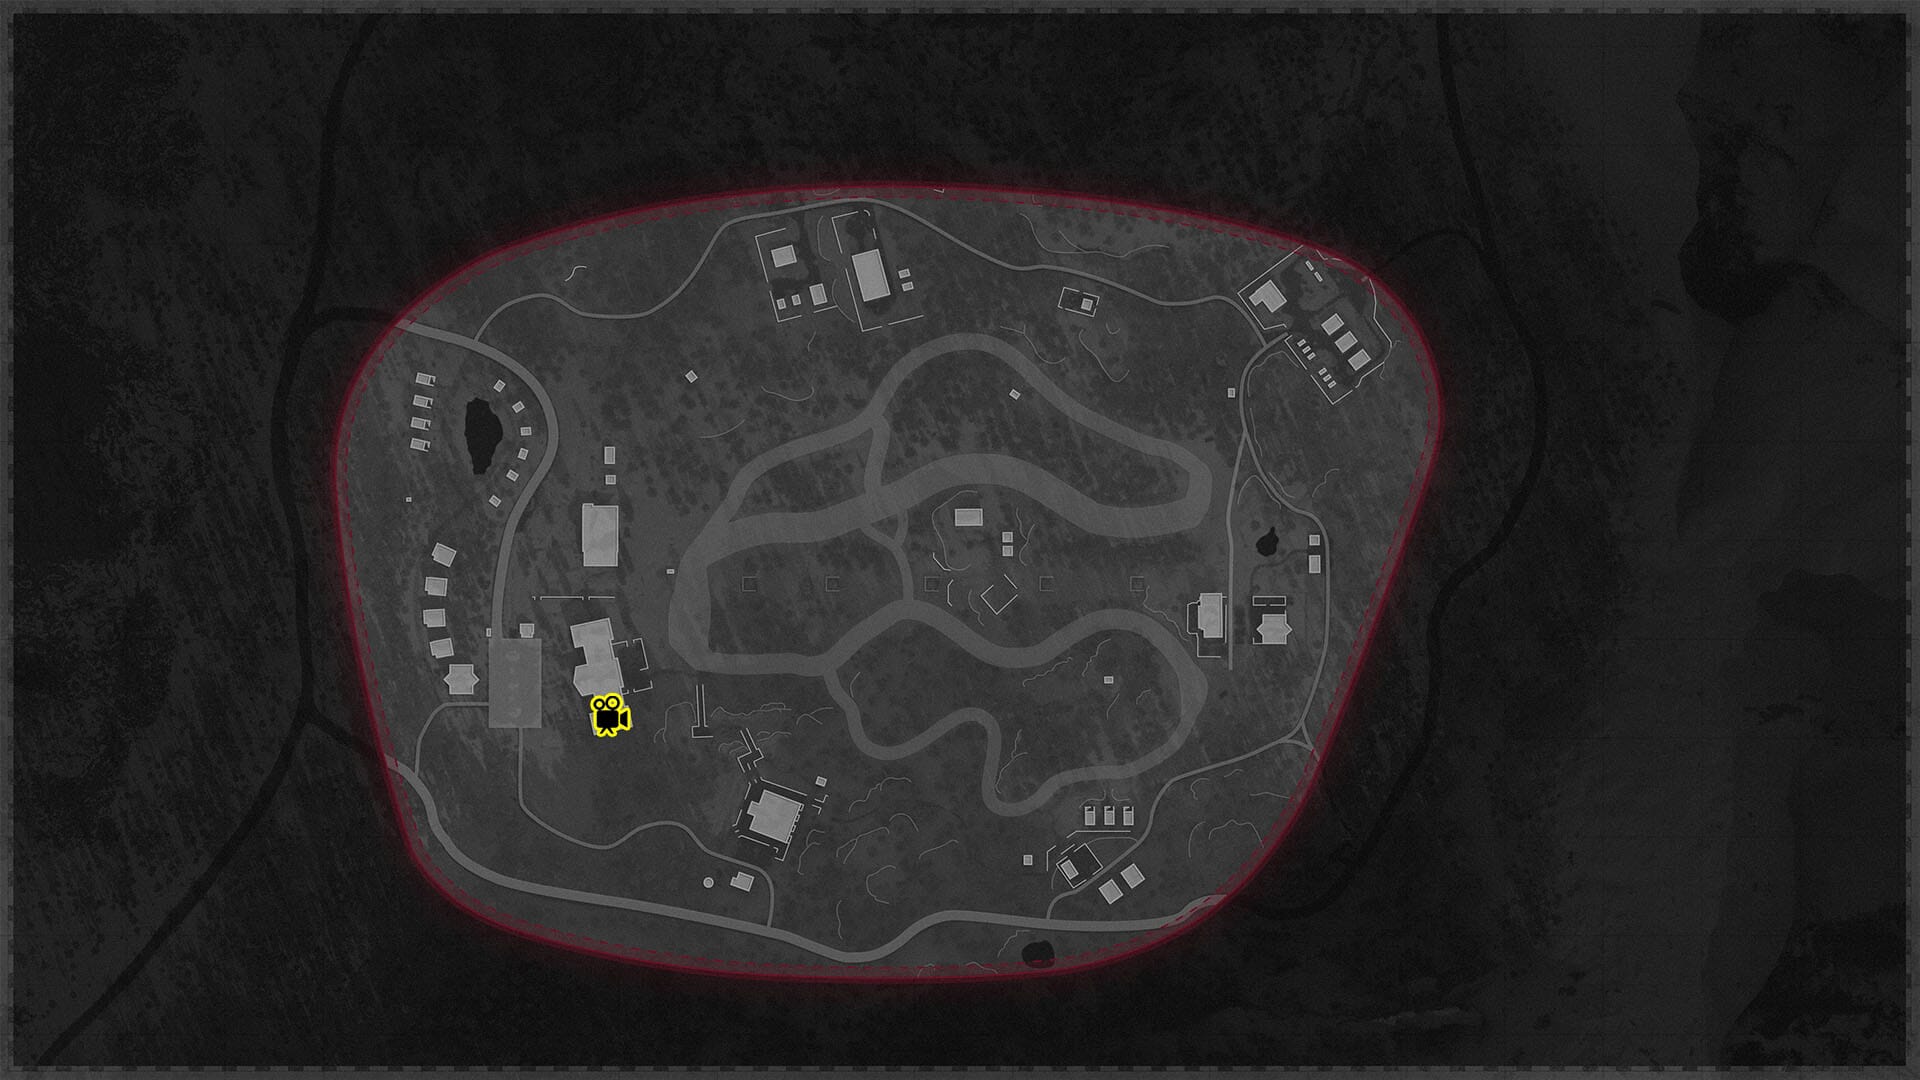
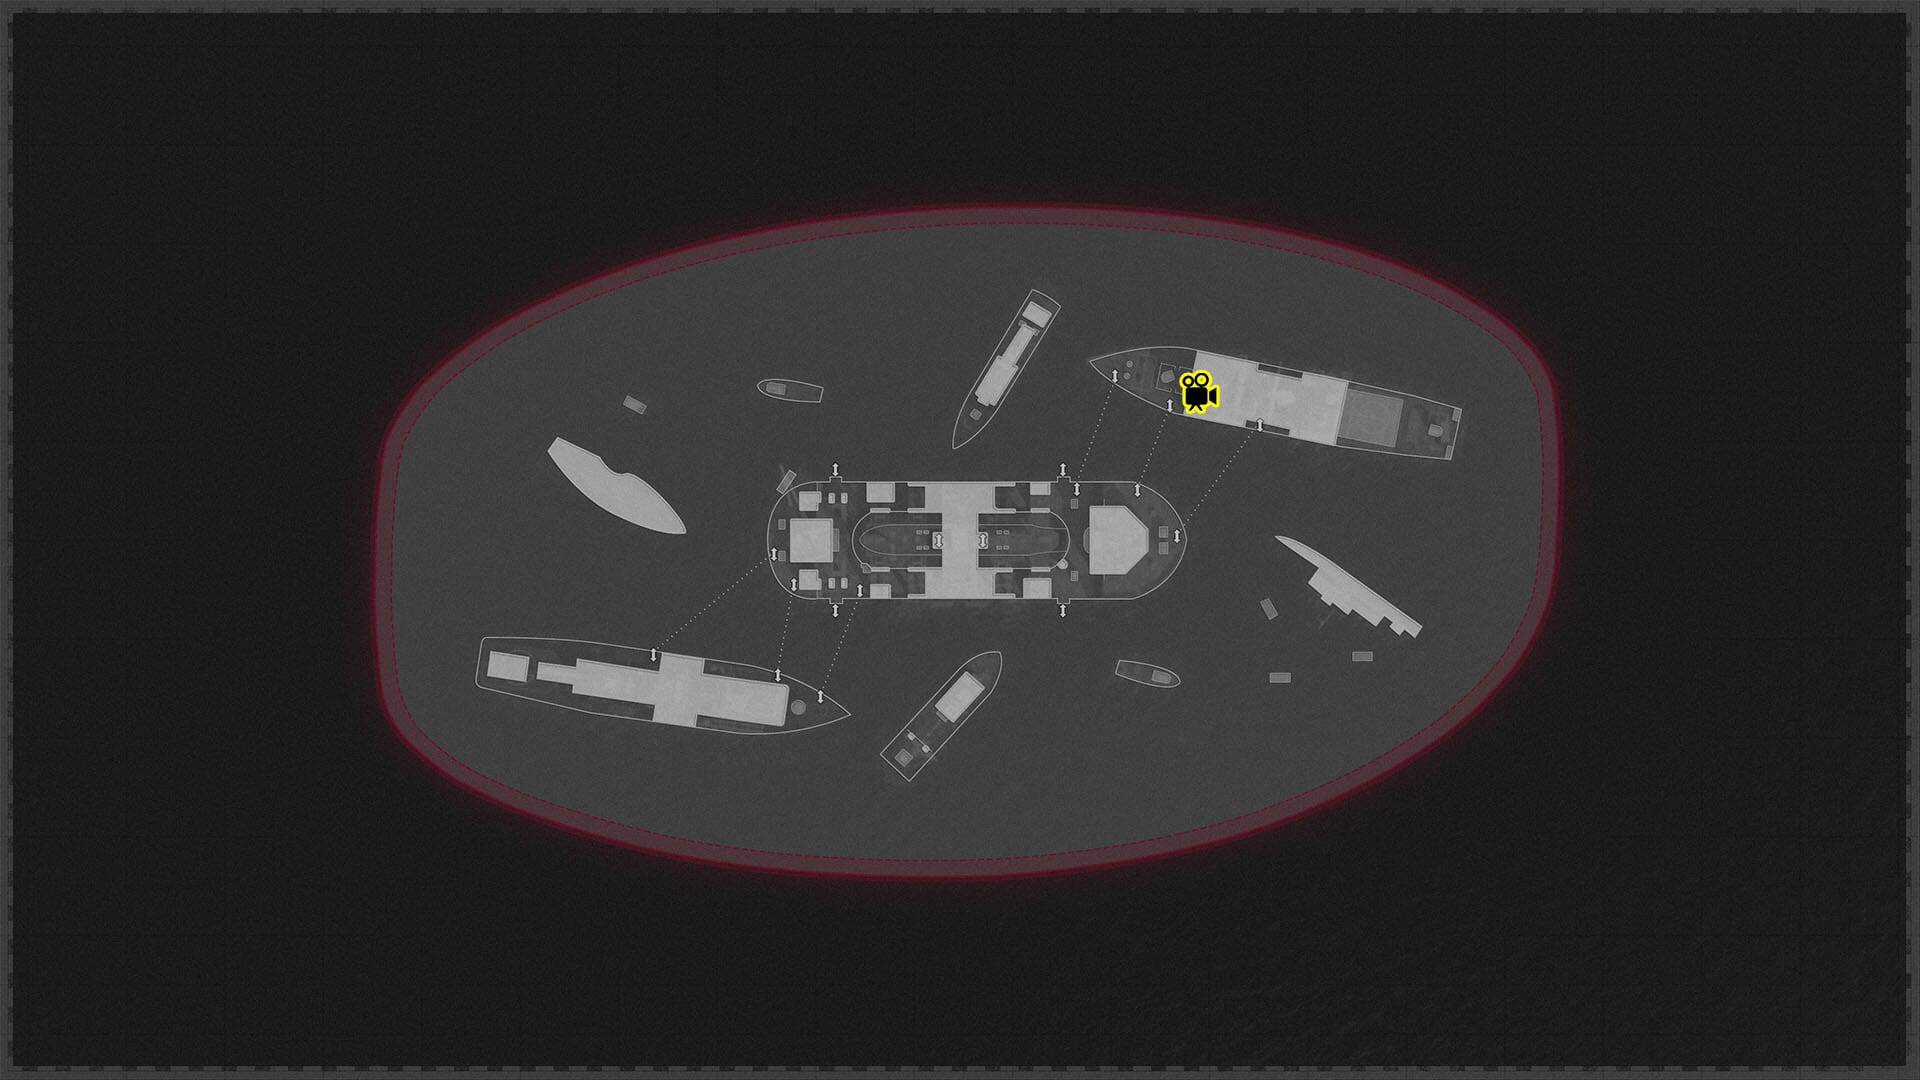
  • Find the Cymbal Monkey statue that has an M Mark next to it. Locations based on the map you're on are as follows:
  • Destroy the statue and pick up the Microfilm Slides that it drops.
  • Head to the Projector on the map, and watch the flip through all the slides, while letting the dialogue for each slide play. Projector locations based on the map you're on are as follows:
  • Teleport to the next world, which will be Ruka.

Step 7: World 5 Set Up

  • Do all map objectives.
  • OPTIONAL! Complete a Trial.

Step 8: Operation Inversyia

  • Head to the Missile Silos in Ruka, and go down the Elevator Shaft.
  • Head to Shaft A, until you reach a computer terminal which you need to activate, after which a cutscene will play.

Step 9: Secure the Keys

  • NOTE These can be done in any order.
  • Secure three keys from the following locations:
    • Shaft A
      • A spectral monkey can be heard spawning near a random vent.
      • Head to the bottom of the shaft, into a deadend to acquire a modified essence trap.
      • Throw the essence trap near the monkey's location, which will attract it.
        • WARNING Do not throw the essence trap into the vent, just outside of it, so the monkey doesn't disappear.
      • Once the monkey is near the trap, activate the trap to capture it.
      • Pick up the key left behind.
    • Shaft B
      • Head to the Aetherium Container and interact with it.
      • Move around the Shaft B area, and destroy the Aether Crystals, until you have collected 20 in total.
      • Head back to the Aetherium Container and interact with it again.
      • Pick up the Aether Canister.
      • Head over to Shaft D, until you find an ethereal jellyfish.
      • Activate the newly given Field Upgrade next to it, which will cause the player to be caught by the Jellyfish.
      • Pick up the key.
    • Shaft D
      • In the passageway to Shaft C, interact with the dead corpse that has the key.
      • Kill the HVT Mimic that spawns in.
      • Pick up the key.

Step 10: Insert the Keys

  • In each shaft the key was obtained from, (Shaft A, Shaft B, Shaft D) insert the keys in the order you obtained them from the Key Order Solver below.

Key Order Solver

Look at the green lights near the terminal (1–3 from left to right). Click each shaft key in the order you need to insert them.

Insert keys in this order:
1st: — 2nd: — 3rd: —

Step 11: We Are Legion

  • Once all three keys are inserted, head outside of the missile silos which will start the boss fight.